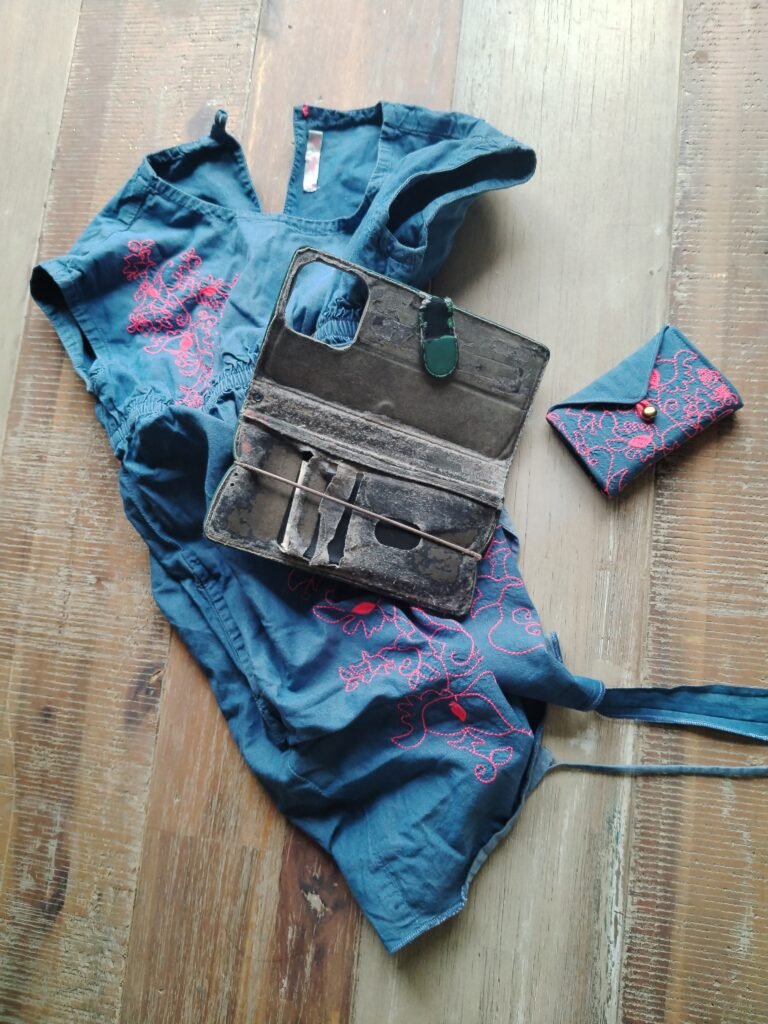
The Little DIY Card Purse began, not with a pattern or a carefully planned project, but with a problem that needed solving. My phone wallet had finally given up after years of faithful service, so instead of immediately looking for a replacement, I paused and asked myself: what do I already have that could work — and could this be something the girls and I make together?
That question led me to one of my daughters’ old dresses. It had long since been outgrown, but the fabric was still beautiful and far too lovely to throw away. My [8-year-old] had strong opinions about it too — she’s been eyeing my fabric stash (and occasionally cutting into it without asking) for months now, so this felt like the perfect chance to give her scissors a proper job to do: cutting the pattern pieces, ironing on the interfacing, and needle-felting a little flower for a touch of colour, while I handled the machine sewing.
There is something special about making things from the girls’ old clothes, and something even better about making them with the girls. It also brings me back to something I wrote about in The Heritage I Hope to Leave: the things we pass on aren’t always things we can put a value on.
So, let’s make a little purse together. I’ll show you the pattern, measurements, and which steps are perfect for little hands too.
What You Need
This post contains affiliate links. If you click through and make a purchase, I may earn a small commission at no extra cost to you — I only link things I’ve genuinely used with the girls.
For the purse:
- Fabric
- Interfacing for extra structure
- Thread
- Magnetic snap, popper, button, or Velcro (depending on your design)
- Ribbon or crochet chain
- Sewing machine or hand sewing supplies
For the felted flower (optional, but a lovely touch — and a great job for little hands):
- A small amount of wool roving in your chosen colour
- A felting needle (or multi-needle tool, a little easier for kids to manage)
- A felting mat or foam block to felt on
- A simple flower stencil, if you’d rather trace a shape than felt freehand
Skill level: Beginner-friendly (the felted flower is a great task for kids around 7+, with supervision — the needles are sharp and barbed)
Time required: Approx 2 hrs, plus 15-20 minutes for the felted flower
Seam allowance: 1cm
The Pattern Explained
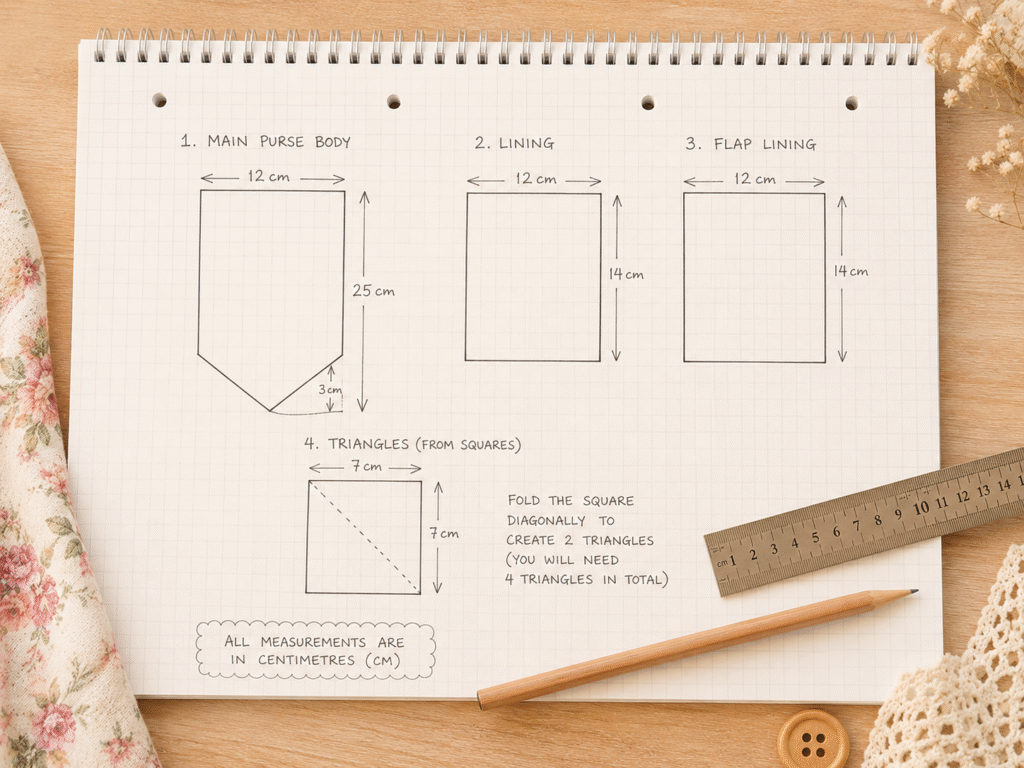
The Little DIY Card Purse is made up of just a few simple pieces, so the pattern is easy to draw out yourself. I’ve included the measurements below to help you create your own pattern pieces. All measurements are in centimeters and are including a 1 cm seam allowance.
1. Main Purse Body
Cut 1 piece measuring 25 cm × 12 cm from your outer fabric.
This is the main body of the purse. The longer piece will fold to create the front, back and flap of the purse.
2. Lining
Cut 1 piece measuring 14 cm × 12 cm from your lining fabric.
This piece will form the lining inside the lower section of the purse, underneath the triangular side pieces.
3. Flap Lining
Cut 1 piece measuring 12 cm × 12 cm from your lining fabric.
This piece will be used to line the flap of the purse.
4. Triangular Pieces
For the triangular sides, cut 4 squares, each measuring 7 cm × 7 cm.
Once cut, divide each square diagonally from corner to corner to create 8 triangles. These triangles will be used to form the sides of the purse.
Cutting Your Pieces
Once you have drawn your pieces onto paper, label each one before cutting your fabric. This is especially helpful with the smaller triangular pieces, as it will make the assembly steps much easier to follow.
A little tip: If you’re making your purse from an old garment, take a moment to look at the fabric before cutting. You may be able to position your pattern pieces so that you can make use of a pretty hem, a pocket, a button or another special detail from the original garment.
Who Does What
This is very much a two-person project in our house, so before we get started, here’s how we split it between us — and how you might split it with your own little helper.
Mum (machine sewing, trickier bits):
- Cutting and assembling the pieces that need precision
- The bulk of the machine sewing — though I did hand the machine over for a bit, more on that below
- Adding the closure and finishing touches
Faye (age 8):
- Cutting out the pattern pieces, once they were marked and pinned
- Ironing on the interfacing
- Having a go on the sewing machine herself, for the straight seams on the pocket pieces — a good, low-stakes place for a first try, since there are no curves or tricky corners yet
- Needle-felting a little flower for extra decoration (optional — ours is still a work in progress!)
If you’re making this with a child of your own, I’d say 7 and up is a good starting point for the cutting and ironing steps, and the straight-seam machine sewing is a lovely next milestone once they’re comfortable with scissors and an iron. The felted flower is a nice one to hand over almost entirely — it’s forgiving, there’s no “wrong” way to do it, and little hands tend to enjoy it more than the precision of the purse itself.
Preparing Your Fabric
Before you start cutting, it’s worth taking a little time to prepare your fabric properly. This is particularly important when you’re giving an old garment a new life, as the fabric may have already been washed and worn many times.
First, make sure your fabric is clean, completely dry and well ironed. Smooth, flat fabric makes measuring, marking and cutting your pattern pieces so much easier, and it helps to ensure everything comes together neatly later on.
If you’re using fabric from an old garment, carefully remove any seams, labels or unwanted details, taking care not to damage the fabric. Don’t be too quick to throw anything away, though! I often find that little details from an old garment can become lovely features in a new project.
For this purse, I spent a little time looking at the pink stitching that was already on the dress. I liked it too much to simply cut through it, so I thought about where I wanted it to appear on my finished purse and positioned my pattern pieces accordingly. I love this part of working with old clothes—you get to make something new while still keeping little reminders of what the fabric once was.
Once you’re happy with the placement, give everything one final press and lay your fabric flat. Then, you’re ready to transfer your pattern pieces and start cutting.
A little tip: Take your time with this stage. When you’re working with an old favorite garment, it’s worth looking at the fabric before reaching for your scissors. You might find a pretty stitch, hem, button or even a tiny detail that deserves to be part of its next life.
Assembly Instructions
Step 1: Prepare the Pieces
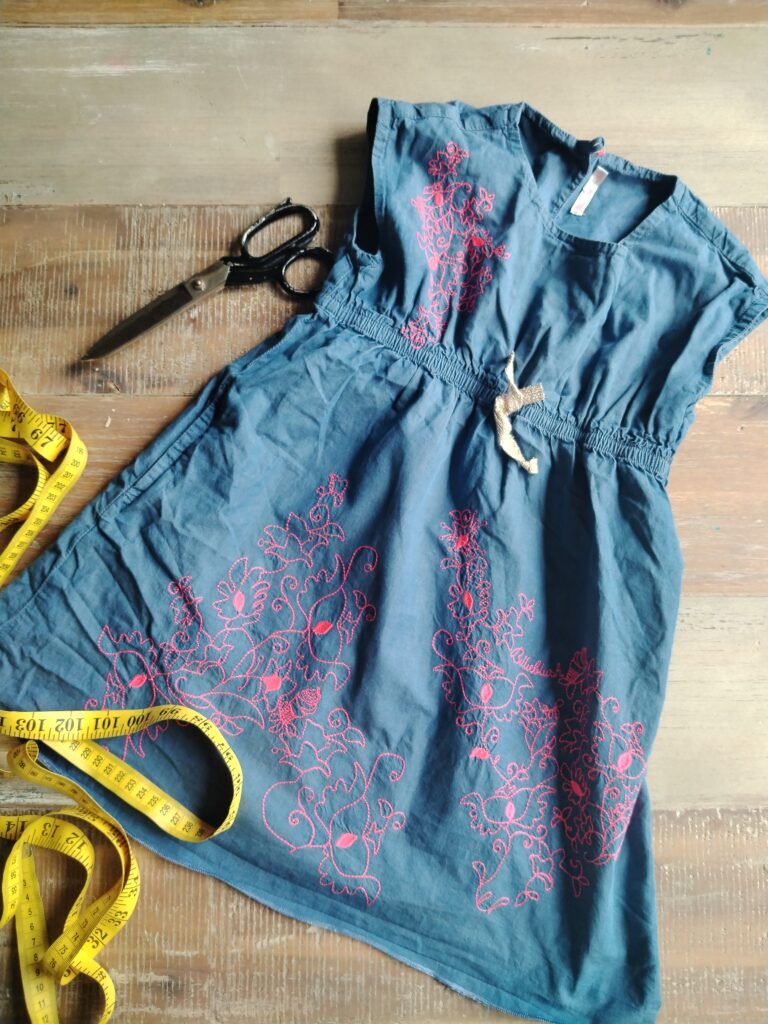
Before cutting into my fabric, I like to make a full-size paper pattern. With a small project like this, it makes it much easier to work out exactly where I want the details of the original fabric to sit on the finished purse. It also gives me a chance to make sure that the grain of the fabric is running in the right direction on each piece.
I placed the pattern pieces onto the fabric, moving them around until I was happy with the placement. In particular, I wanted to make sure the pink stitching I mentioned earlier would end up where I wanted it on the finished purse.
Once everything was in the right place, I pinned the pattern pieces securely and carefully cut them out.
Next, I added the interfacing. I interfaced the main purse body and the four squares that will become the triangular side pieces. The interfacing gives these pieces a little more structure and helps the finished purse keep its shape.
Take your time with this stage—especially when working with a fabric that you’re re-purposing. A few extra minutes spent getting the pattern placement right can make all the difference to the finished piece.
Step 2: Make the Card Pocket
Now that all the pieces are cut and the main pieces have been interfaced, we can start putting the purse together.
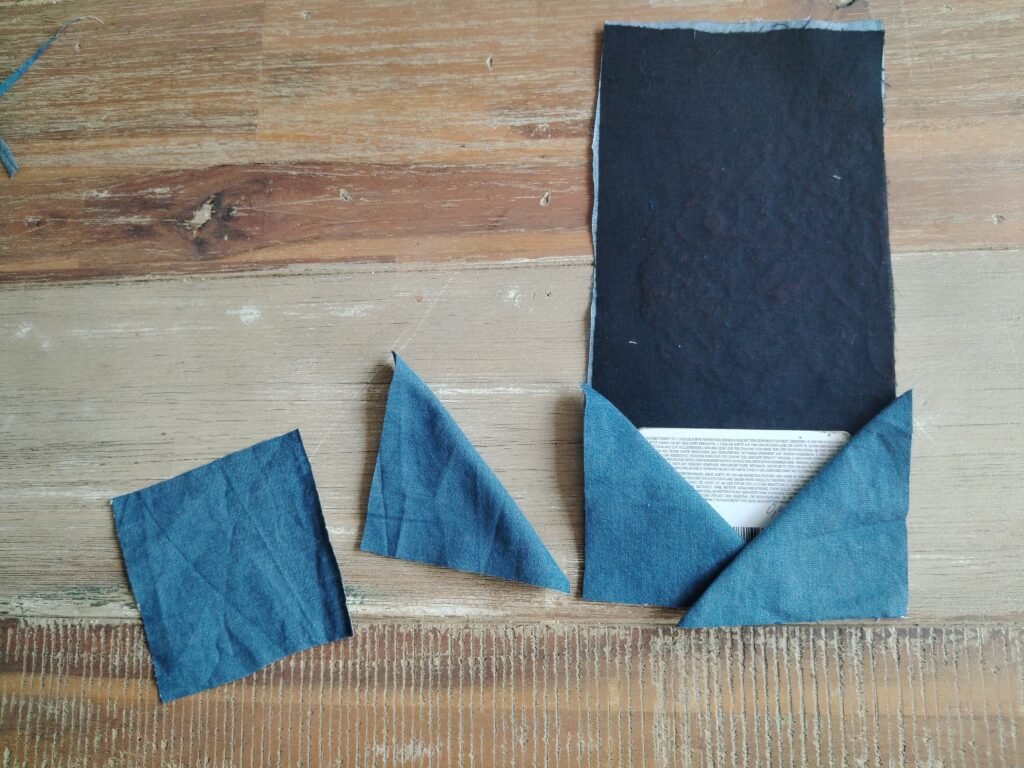
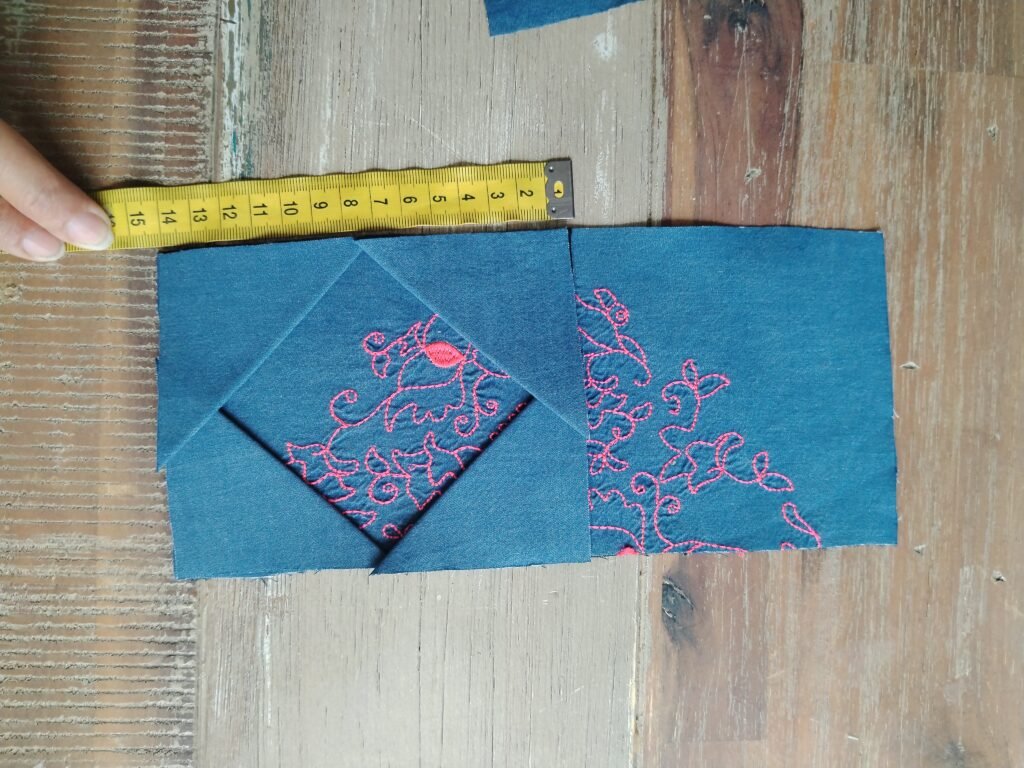
First, take the four square pieces that will become the little triangular sides. Fold each square in half, wrong sides together, and give it a good press with the iron. This creates a neat folded edge and turns each square into a rectangle.
Next, position the folded pieces onto the lining, making sure they are evenly placed and the raw edges are aligned. Pin them in position and stitch them securely in place. These pieces will form the little pockets on the inside of the purse.
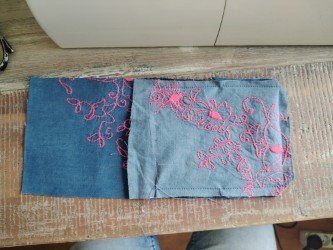
Once the pockets are attached, it’s time to join the outer fabric and lining. Place the outer purse body and its lining right sides together, matching the edges carefully. Pin around the edges and stitch, leaving the appropriate opening for turning.
Do the same with the flap: place the outer flap and flap lining right sides together, match the edges and stitch around them, again leaving an opening where needed for turning.
Take your time around the pointed end of the flap. This is one of those little details where careful stitching and trimming will help you achieve a nice, neat point when the flap is turned right side out.
Step 3: Adding the Closure and Finishing the Edges
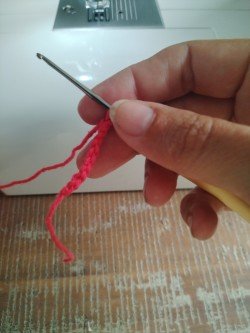
Before turning the purse right side out, I added a little crochet chain to act as the closure. I simply made a small chain to the length I wanted, then tucked the ends between the two layers of fabric at the point of the flap. Make sure the loop is sitting in the correct position before stitching, as it will be secured when you sew the layers together.
Next, I trimmed away a little of the excess fabric from the corners, being careful not to cut into the stitching. Removing some of the bulk from the corners will help them sit much more neatly when the purse is turned right side out. Around the pointed flap, take a little extra care when trimming so that the point can be turned cleanly.
Then comes the satisfying part—turning everything right side out. Gently push out the corners and the point, then give the purse a good press with the iron. Pressing at this stage really helps to define the shape and gives the purse a lovely crisp finish.
Once everything was sitting nicely, I top-stitched around the edges. This not only gives the purse a neat, finished look but also helps keep the edges flat.
Finally, I closed the small opening left for turning with a few neat hand stitches.
At this point, the purse is really starting to take shape, and all those little pieces are finally becoming one useful little bag.
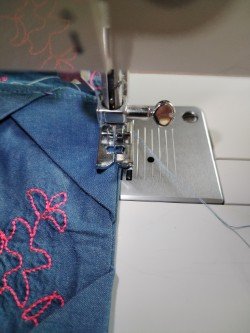
Step 4: Add the Button and Finish Your Purse
We’re almost there! Once everything has been pressed and the edges are neatly top-stitched, it’s time to add the final little detail—the button.
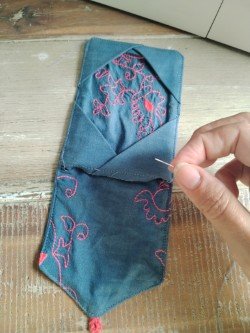
Fold the flap over the front of the purse and decide exactly where you want the button to sit. Mark the position, then sew the button securely in place.
Before you finish, try a few of your cards inside the purse to make sure they fit comfortably and that the flap closes neatly with the crochet loop. It’s much easier to make any small adjustments now than once you’ve finished all your stitching.
And that’s it! Your Little DIY Card Purse is ready to go.
I love this final stage because this is when the practical little purse really comes together. What started as a piece of an old dress has now become something useful again—and hopefully something you’ll reach for whenever you’re heading out on a little errand.
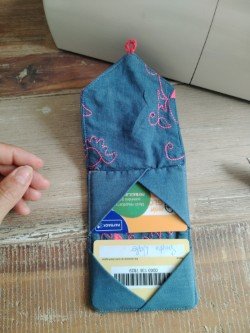
Variations and Creative Ideas
One of the lovely things about this little purse is that once you have the basic shape, there are lots of ways you can play with it. You can change the fabric, add little details or even give it a completely different purpose.
Add a Wrist Strap or keying
If you want to keep your purse close at hand, you could add a small wrist strap. A fabric strap, crochet chain or piece of ribbon would all work nicely.
Alternatively, add a small keying or clasp so that you can attach it to your keys, your handbag or even a belt loop. This would make it particularly handy for carrying just a few cards and a little cash when you’re out and about.
Turn It into a Little Coin Purse
Why not experiment with felting? A small piece of felted wool could make a lovely variation, and you could adapt the design slightly to create a little coin purse instead. Felted wool would give it a soft but sturdy feel and would be another wonderful way to use an old woolen jumper.
Add Some Bead Embroidery
If you enjoy embroidery, this little purse gives you a perfect canvas for some bead embroidery. A scattering of tiny beads, a simple flower or even a decorative border could turn an otherwise simple purse into something really special.
Mix Your Fabrics
This is also a lovely project for using up smaller pieces of fabric. Try combining different prints, textures or colors for the outer purse and lining. You could even use scraps from previous projects to create something completely unique.
Make It From an Old favorite
And, of course, you can do what I did and give an old favorite garment a new life. An old dress, shirt or blouse can provide more than enough fabric for this little project. Look out for details such as pretty stitching, buttons or embroidery that you can incorporate into your design.
There really are no limits to what this little purse could become. Once you start looking at those scraps and old clothes as possibilities rather than things to discard, you might find yourself coming up with ideas I haven’t even thought of yet.
Conclusion
And there we have it—the Little DIY Card Purse is finished. A small, useful purse made from a piece of an old dress, but for me, it carries a little more than just my cards.
Whenever I look at it, I think of the girls and the many stories attached to those old clothes. There were plenty of adventures, a fair amount of mischief, and, as is often the way with children, quite a few moments that I wouldn’t have appreciated quite so much at the time! Giving a piece of that dress a new life means I get to keep a little reminder of those days with me, rather than simply packing the memories away with the clothes.
It also brings me back to the idea behind my post about The Five Little Purses. I wrote about how those little purses came to be and the stories, memories and resourcefulness woven into making things rather than simply buying them.
I think that’s what makes sewing such a wonderful thing. We aren’t just creating something useful; sometimes we’re preserving a memory, using up something that might otherwise be discarded, or finding a new purpose for something that has already served us well.
And perhaps that’s the best thing about making this little purse. You don’t need to use a special piece of fabric or an old dress with a story behind it. You can make it from scraps, leftover quilting cotton, an old shirt, or whatever you happen to have.
Because sometimes, when we look at what we already have a little differently, we find that it isn’t the end of its story at all.