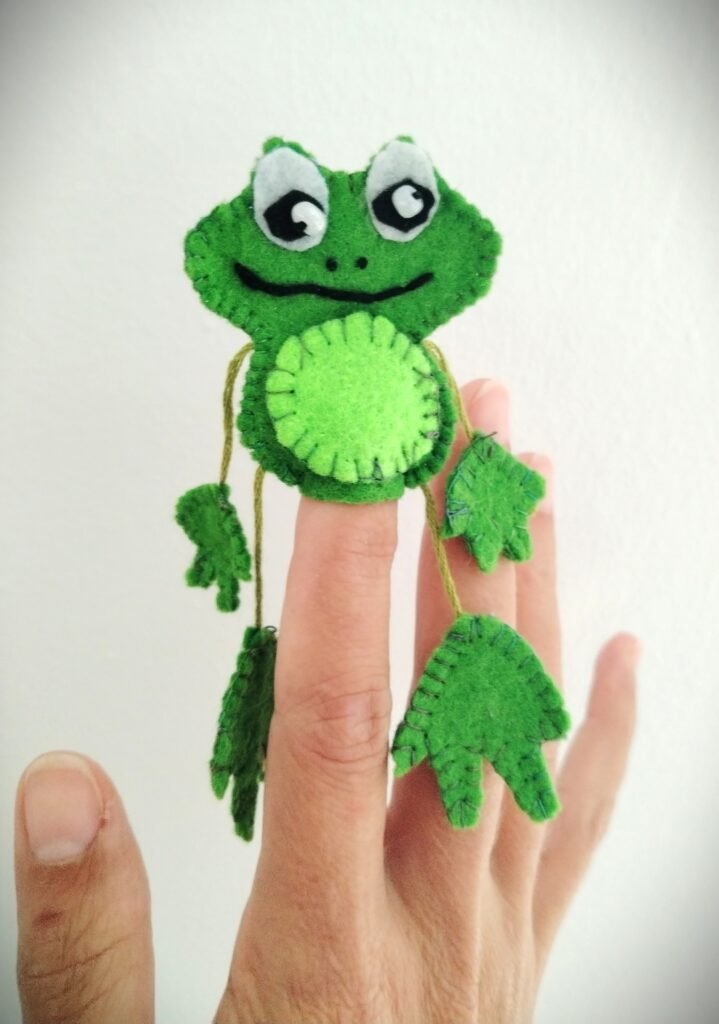
Can you imagine a fun way for kids to learn a language? Try these felt finger puppets for storytelling and language learning on your next rainy afternoon! I didn’t even set out to do this with my daughters — it started as a little gift for my nephew, and a bit of head space time for myself. I sat down with my bits and pieces and some music, drew out a few patterns, and started cutting. Before long, my younger girl came over to see what I was up to, and by the time we’d almost finished the first puppet, all the giggling and chatting drew her older sister in too. Before we knew it, the three of us were sitting there together, and the puppets got more fantastic — with the wildest stories — by the minute!
As we worked, I used the German words for the shapes, colors, and tools, and the girls just copied me without even realizing they were learning. It doesn’t have to be German, either — any language works this way, because the point was never really the teaching. It was just fun.
Why Felt Finger Puppets Are Great for Language Learning
Looking back, I don’t think I set out to “teach” anything that afternoon — but a lot was happening under the surface. When kids’ hands are busy with something tactile, like cutting felt or pushing a needle through fabric, their brains seem to relax into conversation in a way they don’t when you sit them down for a lesson. There’s something about the repetitive motion of stitching that keeps kids settled and open, rather than fidgety and distracted.
Naming things as you go — “pass me the blue felt,” “this one needs a triangle ear” — gives kids a reason to hear and repeat new words without ever feeling quizzed on them. That’s really the difference between this and flashcards: nobody’s being tested, so nobody clams up. With Faye, I noticed she’d repeat a word back almost immediately, usually folded right into whatever story she was making up for her puppet at the time.
With all the laughing going on, I lost concentration at one point and rammed the needle straight into my index finger. That’s the moment the more colorful German came out — and go figure, that was the vocabulary nobody needed repeated even once!
There’s also a real developmental link between hands-on play and language that speech-language pathologists talk about often — using your hands and using your words seem to be more connected than people realize. I’ve linked a great video below that explains this far better than I can.
None of this needs a lesson plan. A pile of felt, a needle, and a bit of narrating what you’re doing is enough to turn an ordinary craft afternoon into real language practice — and in our case, it turned into a proper family activity once my older girl wandered over too.
What You’ll Need to Get Started
Nothing about this project requires a trip to a specialty shop — that’s honestly half the appeal. If you’ve got a bit of a fabric stash already, you probably have most of it lying around.
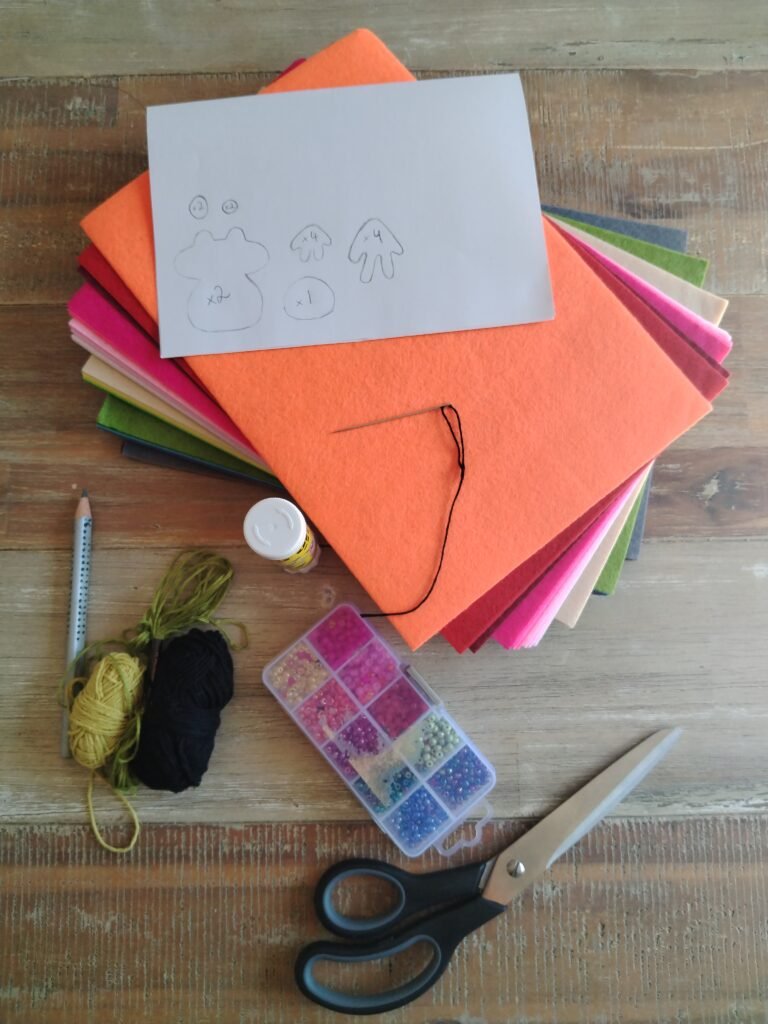
Felt sheets in a few colors — I’d say start with at least five or six so there’s enough variety for naming and matching. Craft felt works fine for this; you don’t need anything fancy.
A needle and thread — a basic hand-sewing needle is all you need, nothing specialized. If your child is very young or new to sewing, a blunt plastic needle is a safer starting point.
Sharp scissors — felt cuts cleanly, which makes it forgiving for smaller hands still learning control.
A bit of stuffing — optional, only if you want your puppets to have a bit of shape rather than sitting flat.
Simple shape templates — circles, triangles, squares, whatever you’re comfortable free handing or tracing. I just sketched mine straight onto the felt with chalk, no template needed, but if you’d rather not draw freehand, tracing round a cup or a book corner works just as well.
If your child isn’t quite ready to sew yet, fabric glue is a perfectly good stand-in for this whole process — you lose a bit of durability, but you keep every bit of the naming and storytelling side of things. That’s really the part doing the language work, not the stitching itself.
That’s it. No special kit, no big shopping trip — just felt, thread, and a rainy afternoon.
Turning Colors and Shapes Into a Vocabulary Lesson
I already had my pattern pieces cut and knew which animals we were making, so I started things off gently — a bit of a “warm-up.” I showed Faye the pictures of the animals first, calling each one by its German name as I did. Still mostly speaking English otherwise, just easing her in.
Then I asked her, in English, what color she wanted the frog to be. When she answered, I repeated it back to her in German. Same with the shade — I’d ask, she’d answer, and I’d echo it in German. From that point on, those words just lived inside our English sentences without me making a fuss about it. “Pass me the grün felt” became completely normal between us.
I kept things loose and focused purely on vocabulary while we were actually making the puppets — no grammar, no correcting, just words attached to what was right in front of her. Shapes, colors, the odd tool name here and there. I saved anything more structured, like actual sentence-building, for later, once the puppets were finished and the storytelling started.
Looking back, it worked because it never felt like a lesson to her. It was just how I talked while we made things — and she copied it right back without a second thought, the way kids do when nobody’s watching too closely.
How to Sew a Felt Finger Puppet Step-by-Step
1. Print and cut your shapes
Print out the puppet templates from the free pattern download below, and cut out each shape — ovals for bodies, triangles for fins, wings, and beaks, small circles for eyes. Pin or trace each template onto your felt, then cut two matching body pieces per puppet, front and back, sized to comfortably fit a small finger.
2. Sew on the smaller details first
Before joining the body pieces, sew the smaller shapes onto the front piece — wings, fins, a shell, a beak — while it’s still flat and easy to handle. This is much simpler than trying to attach fiddly bits once the puppet’s already closed up. To make it even simpler, and avoid trying to pin tiny pieces, I glued them on with a glue stick and then used the blanket stitch to keep them there permanently.
We each had chosen one and worked simultaniously.
3. Sew the body pieces together
Now stitch the front and back body pieces together around the edges, leaving the bottom open for a finger to slide into. We used the Blanket stitch again as I like its finish on felt.
4. Let them “test drive” straight away
Rather than finishing the whole set before playing, we tried each puppet the moment it was done. That kept the energy up and gave Faye an immediate reason to keep going.
Using the Puppets for Storytelling Play
Once all five were finished and lined up on the table, that’s when the real fun started. I’d held off on grammar while we were sewing, saving it for this moment — Faye already had the words, now she just needed a reason to string them together.
We put on some music, tipped the puppets onto the table, and I started asking simple questions. “Wo ist der Frosch?” (Where’s the frog?) She’d point him out and hop him across the table. Before long, “Der Frosch hüpft” (the frog hops) came out on her own.
I kept sentences short, present tense or simple past, and made a point of not over-correcting — honestly as much a lesson for me as for her. It’s tempting as a grown-up to want everything tidy and perfect, but fixing every little slip drains the fun right out of it. If something came out jumbled, I’d just repeat it back naturally and move on.
From there it turned into proper play — the fish swam past the frog, the bird flew overhead with its own sound effects, and the turtle predictably got left behind. Faye narrated for all of them herself, mixing English and German without a second thought.
A few simple story starters, if you’d like a nudge:
- The frog is looking for a friend — each animal takes a turn saying hello and what it can do.
- A race to the water — who gets there first, the hopper, the swimmer, or the slow one?
- Someone’s missing — the bird can’t find the turtle; the others help by naming where he might be.
Bringing It All Together
Looking back, what started as a quiet afternoon making a gift for my nephew turned into one of the loveliest things Faye and I have done together — and it happened almost entirely by accident. No lesson plan, no pressure, just felt, thread, and a bit of narrating as we went.
If you try this with your own kids, don’t overthink it. It doesn’t have to be German, and it doesn’t have to be perfect — the words will stick far better when nobody’s worried about getting them exactly right. Pick a few animals, keep your sentences short, and let the story take over once the puppets are made.
If you’d like to skip the pattern-drawing and jump straight to stitching, grab the free pond crew pattern below — it’s the same five animals Faye and I made, ready to print and cut.
I’d love to hear how it goes if you give it a try — drop a comment with what your kids named their puppets, or tag me if you share a photo. And if you end up wanting more sets to keep the fun (and the vocabulary) growing, keep an eye out — there’s more of this coming.