

I love to grow berries because it’s a challenge that just keeps on giving with huge rewards once you get it right! We already have Strawberries, Raspberries, Currants, Blueberries, Pheasant berries so why not add Cranberries?
They are fun to grow and pick and taste so much better if picked when fresh, rather than weeks ahead, as the ones in the supermarkets normally are – plus, if you are like me there wont be any chemicals used on these babies!
The last challenge were blueberries and it looks like I finally found the right spot, prepared the soil the right way and they are thriving, so its time to move onto the next one! And what better one to choose than cranberries! They are one of my favorites with their tart flavor and multitude of purposes, not to mention all the health benefits.
I just never thought they would grow on a regular farm as the first time I looked it was all about bogs and flooding them for harvest, but the more I read up on them the more it seemed totally possible to plant, grow and get decent harvest of them.
Let’s dig into everything you need to know to get started on this exciting garden adventure.
Setting Up Your Growing Space
- Location Requirements
Listen, finding the perfect spot for your cranberry bed is like choosing a new home – location is everything! Trust me, I learned this the hard way when I first started growing cranberries.
Your little cranberry patch is going to need plenty of sunshine – we’re talking about 6-8 hours of direct sunlight daily. You’ll want to pick an area with good air circulation too – imagine a gentle breeze being able to dance around your plants.
Here’s a pro tip: avoid those low spots in your yard where water tends to pool after rain. I made that mistake once, and let’s just say cranberries prefer their feet damp, not drowning! For a beginner’s patch, start with a 4×4 foot area – it’s enough space to get a feel for growing without being overwhelming. Remember, you can always expand later when you’ve caught the cranberry-growing bug!
2. Soil Preparation (The Most Critical Part!)
Getting your soil just right is magic! Think of it as creating the perfect recipe, where each ingredient plays a crucial role. Your cranberries are going to need a special soil mix that’s completely different from your regular garden beds. Start by building a raised bed about 8 inches deep – this gives your plants plenty of room to establish strong roots.
Now, here’s my tried-and-true soil mix: combine 60% peat moss, 20% sand (think beach texture), and 20% topsoil. The peat moss is super important because it creates that acidic environment that cranberries absolutely love. You’ll need to keep the soil pH between 4.0-5.5. If your pH is too high, just sprinkle in some sulfur to bring it down. Oh, and here’s a little secret that saved my garden: line the edges with landscape fabric to keep those enthusiastic cranberry vines from taking over your whole yard!
Planting Your Cranberries
Getting Started
Spring planting is such an exciting time for any gardener! There’s something truly special about tucking those first cranberry plants into their new home.
The best time to plant is early spring, right after the last frost has passed and the soil is starting to warm up. When placing your plants, think of giving them their own personal space – about 12 inches apart is perfect. I learned through experience that planting depth matters a lot with cranberries. Plant them just slightly deeper than they were in their nursery pots, but don’t go overboard! After planting, give them a thorough but gentle watering – think of it as a welcome drink in their new home.
Here’s a fantastic tip that commercial growers use that works great in home gardens too: spread a 1-inch layer of sand over the soil surface. This helps prevent weeds and keeps the soil surface clean, which your cranberries will absolutely love!

Variety Selection
Best varieties for home gardens:
Here’s a helpful list of cranberry varieties perfect for home gardens – each one has unique qualities that make it special for different growing situations:
Stevens
- Perfect choice for beginners
- Known for being hardy and forgiving
- Produces large, deep red berries
- High disease resistance
- Great overall yield
- Can adapt to various soil conditions
- Takes about 3 years to reach full production
Pilgrim
- Ideal for small spaces and container growing
- Compact growth habit
- Medium-sized, deep burgundy berries
- Heavy producer despite smaller size
- Good disease resistance
- Perfect for raised beds
- Excellent for fresh eating
Howes
- Champion of storage life
- Berries can keep for several months when properly stored
- Medium-sized, firm berries
- Late ripening variety
- Very disease resistant
- Traditional variety since 1843
- Great for preserving and cooking
Ben Lear
- Early ripening variety
- Large, bright red berries
- Great for northern climates
- Strong producer
- Good for both fresh eating and processing
- Ripens about 2-3 weeks earlier than other varieties
- Perfect if you want an early harvest
Bonus Tips for Variety Selection:
- Start with just one or two varieties until you get the hang of growing
- Consider your climate when choosing – some varieties are more cold-hardy than others
- Think about what you’ll use the berries for (fresh eating, cooking, storage)
- Look for disease-resistant varieties if you’re planning to grow organically
- Consider getting plants from a local nursery – they often carry varieties that do well in your specific area
Companion Planting for Cranberries
Let’s explore some fantastic plant partnerships for your cranberry patch! When choosing companion plants, it’s important to select ones that share similar growing conditions – remember, cranberries love acidic soil and consistent moisture. Think of these companion plants as your cranberries’ best garden friends!
Beneficial Companions:
- Blueberries | Perfect partners as they share soil preferences and attract similar pollinators
- Strawberries | Create ground cover and share acidic soil needs
- Lingonberries | Close relatives that thrive in similar conditions
- Rhododendrons | Help create shade and share acid-loving properties
- Azaleas | Excellent border plants that maintain soil acidity
- Mountain Laurel | Provides wind protection and enjoys same soil conditions
- Heather | Attracts pollinators and thrives in acidic conditions
- Wild Violets | Create ground cover and help retain soil moisture
- Pine Trees | Naturally acidify soil with fallen needles
- Wintergreen | Natural ground cover that shares similar growing requirements


The best part about these companions is how they work together! Blueberries and cranberries create a perfect berry patch duo – they share pollinators and both produce delicious fruits. Pine trees act as natural mulch makers, dropping needles that help maintain soil acidity. Ground covers like wintergreen and wild violets help suppress weeds while keeping the soil cool and moist. Having flowering companions like heather and azaleas brings in more pollinators, which means better berry production for your cranberries. Just remember to give each plant enough space to grow without competing for resources. Your cranberry patch can become a beautiful, productive ecosystem when you choose the right plant partners!
Here’s how to implement this companion planting layout effectively:
- Spacing Guidelines:
- Cranberry plants: Space 12 inches apart in rows
- Rhododendrons/Azaleas: Plant 4-5 feet from cranberry bed for wind protection
- Ground covers (Wintergreen/Wild Violets): Plant between cranberry rows
- Allow 2-3 feet between different companion groups
- Planting Tips:
- Plant taller companions (Rhododendrons, Azaleas) on the north side to avoid shading
- Interplant ground covers after cranberry plants are established
- Create paths between rows for easy maintenance access
- Consider adding blueberries at the ends of rows for additional fruit production
- Maintenance Considerations:
- Keep ground covers trimmed back from cranberry plants
- Prune border plants regularly to maintain size
- Mulch paths between rows with pine needles
- Monitor soil moisture levels, especially around ground covers
- Additional Tips:
- Consider adding heather or mountain laurel along the pathways
- Install drip irrigation before planting ground covers
- Place stepping stones for maintenance access
- Leave room for expansion at the ends of rows
Daily Care and Maintenance
Watering Tips
Let’s talk about keeping your cranberry plants happy with the right amount of water. Think of watering cranberries like maintaining a slightly damp sponge – not soaking wet, but never completely dry. When you stick your finger into the soil, the top inch should feel like a wrung-out sponge.
Deep watering is better than frequent light sprinklings – it encourages those roots to grow deep and strong. A drip irrigation system or soaker hose can be a real game-changer – it delivers water right where it’s needed without getting the foliage wet. Here’s a pro tip from my own garden: water early in the morning so the plants have time to dry before evening. This helps prevent disease and keeps your plants healthy. Just remember, consistent moisture is key – cranberries don’t appreciate dramatic swings between wet and dry conditions.
Fertilization Schedule
When it comes to feeding your cranberry plants, remember that they prefer a “less is more” approach. Think of them as those laid-back garden friends who thrive on simple care rather than constant attention. In spring, when you see those first signs of new growth, that’s your cue to apply a balanced acidic fertilizer. Just sprinkle the 10-10-10 fertilizer lightly around your plants – remember, cranberries aren’t heavy feeders!
About mid-summer, they’ll appreciate a light snack with another gentle feeding. Here’s something I learned through experience: using fertilizers designed for holly or azaleas works great because these plants love the same acidic conditions as cranberries. Watch your plants for signs they’re getting enough nutrients – healthy leaves should be a nice deep green color. Too much fertilizer can actually be worse than too little, causing excessive vine growth but fewer berries. I like to mark fertilizing dates on my garden calendar so I don’t forget, and it helps me track what works best from year to year.
Pruning and Training
Let’s talk about keeping your cranberry patch tidy and productive! Pruning might seem intimidating at first, but think of it as giving your plants a gentle haircut to keep them looking their best. Early spring is the perfect time to trim those long runners that want to explore beyond their designated space.
You’ll want to keep the vines about 6 inches in height – this helps with air circulation and makes harvesting easier later on. During the first two years, go easy on the pruning – your plants are still getting established and need those leaves for energy. Remove any dead or diseased vines as soon as you spot them – think of it as pulling weeds, you want to catch them early! I’ve found that using clean, sharp pruning shears makes the job so much easier and keeps your plants healthy. When you’re pruning, it’s a great time to check on your plants’ overall health and catch any potential problems early.
Common Challenges and Solutions
Pest Management
Common pests and solutions:
Even the healthiest cranberry patches can face occasional pest challenges, but don’t worry – we’ve got plenty of earth-friendly solutions! Fruit worms can be pesky visitors, but they’re usually easy to manage with some hand-picking or an organic Bt spray if needed. Those little leaf hoppers might try to crash your garden party, but a simple insecticidal soap treatment usually sends them packing.
One of the most valuable lessons I’ve learned is that prevention is your best friend. Keeping your cranberry bed tidy and maintaining good air circulation goes a long way in discouraging unwanted guests. Regular monitoring – maybe during your morning garden walk with coffee – helps you spot any issues before they become big problems. Remember, seeing a few insects isn’t always bad – some beneficial bugs actually help protect your plants! Through trial and error, I’ve discovered that diversity in nearby plantings helps attract natural predators that keep pest populations in check.
Disease Prevention
Watch for these issues:
Let’s dive into keeping your cranberry plants healthy and disease-free! Preventing problems is so much easier than trying to fix them later – kind of like how staying healthy is easier than getting over a cold. Regular sand topdressing is one of those amazing tricks that commercial growers use, and it works beautifully in home gardens too. It helps prevent a whole host of fungal issues and gives your plants a clean, fresh surface to grow on.
Fruit rot can be sneaky, but improving drainage and air flow works wonders in preventing it. I learned this neat trick: if you see any leaf spots developing, remove those affected leaves right away – it’s like stopping a cold from spreading through your whole family!
Root rot used to be my biggest worry until I discovered the secret: paying close attention to watering patterns and making sure the soil never stays waterlogged. Keep your garden tools clean between uses (a quick wipe with diluted rubbing alcohol does the trick), and you’ll prevent spreading any potential problems.
Harvesting Your Cranberries
When to Harvest
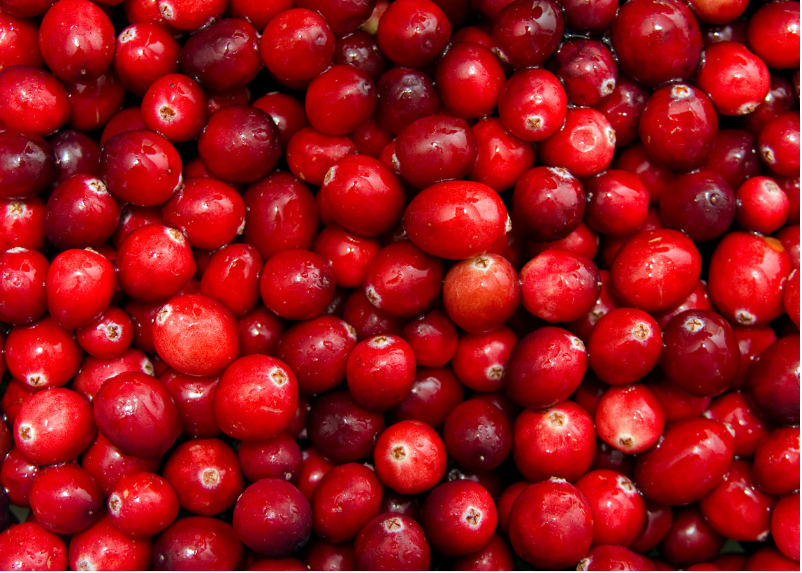
The excitement of harvest season is like waiting for a long-anticipated celebration! Your cranberries will tell you when they’re ready – they’ll turn that gorgeous deep red color, usually sometime between September and October.
Here’s a fun fact that never fails to amaze garden visitors: ripe cranberries actually bounce! It’s true – commercial growers use this as a ripeness test, and you can too. Try bouncing a berry on your kitchen counter – if it bounces, it’s ready! Waiting until after the first light frost can actually make your berries sweeter, but don’t wait too long after that. Pick a nice dry day for harvesting – wet berries don’t store as well. Morning harvesting is ideal, but wait until the dew has dried off the plants. Watch the weather forecast and try to harvest before any hard freezes are predicted.
Harvesting Methods
For home gardens:
Harvesting your own cranberries is like a treasure hunt in your garden! For home gardens, hand-picking is the way to go – it’s gentle on the plants and lets you select only the best berries. I love using a small rake or scoop (you can find these at garden centers) to make the job easier on your back.
Here’s a tip I wish I’d known in my first year: collect your berries in shallow containers or baskets rather than deep buckets. This prevents the bottom berries from getting crushed under the weight of those above them. Sorting as you go saves time later – leave any soft, discolored, or damaged berries behind. They’ll break down naturally and add nutrients back to your soil. Make harvesting a family event – it’s a great way to create garden memories while getting the job done. Plus, having a harvest helper means one person can pick while the other sorts and packs the berries.
Storage and Usage
Storage Tips
Let’s talk about keeping those beautiful berries fresh for as long as possible! The secret to long-lasting cranberries starts right after harvest – resist the urge to wash them right away. Those unwashed berries will stay fresher longer in your refrigerator, just like store-bought ones.
Use breathable containers – those plastic produce containers with ventilation holes work perfectly, or even paper bags with a few air holes punched in them.
Here’s my favorite storage trick: sort through your berries every few weeks and remove any that are starting to soften. One soft berry can affect its neighbors, kind of like how one overripe apple can spoil the bunch!
Properly stored, your cranberries can last 2-3 months in the fridge – plenty of time to use them for holiday baking and beyond. For even longer storage, freezing is amazing – frozen cranberries can keep for up to a year, and you don’t even need to thaw them before using them in recipes.
Creative Uses
Beyond cooking:
Your homegrown cranberries are far too special to use only at Thanksgiving! There are so many creative ways to enjoy your harvest throughout the year. Making your own dried cranberries is incredibly satisfying – they’re perfect for trail mix and baking, and you control the sweetness level.
During the holiday season, those sturdy vines you pruned earlier in the year make gorgeous wreaths and decorations. Here’s a fun project: create gift baskets with your preserved cranberries, homemade cranberry sauce, and maybe even some cranberry-orange bread.
Many home gardeners find their neighbors are eager to trade other homegrown goodies for fresh cranberries – it’s a great way to build community connections! If you have extra, consider selling at local farmers’ markets or holiday craft fairs – homegrown cranberries are quite the conversation starter.
Seasonal Care Calendar
Spring (March-May)
Spring is like New Year’s Day in the cranberry garden – everything starts fresh! This is when you’ll be busiest, cleaning up any winter debris and getting your patch ready for the growing season. Take time to assess any winter damage and prune out dead vines – your plants will thank you with vigorous new growth.
Early spring is perfect for applying that first round of fertilizer, but wait until the soil starts warming up. If you’re adding new plants, this is your moment – the cool, moist conditions of spring are ideal for establishing new vines. Keep an eye on the weather though – late frosts can still sneak up, so have some row cover handy just in case. I love making early spring notes about which areas of the patch thrived last year and which might need extra attention this season.
Summer (June-August)
Summer in the cranberry patch is all about maintenance and watching your plants thrive! This is when those beautiful white flowers appear, promising future berries. Your main job during these months is playing plant detective – keep a close eye out for any unwanted visitors or potential problems.
Consistent moisture is crucial during the hot months, especially when those tiny berries are forming. I’ve found that mulching with pine needles helps keep moisture in and adds a bit of acidity that cranberries love. Weeding becomes a regular task, but it’s a great excuse to spend time in the garden and monitor your plants’ health. Those early morning garden checks are perfect for catching problems early – plus, it’s the coolest part of the day! Remember to maintain good air circulation by gently separating any overcrowded vines. Hot summer afternoons are perfect for planning your fall harvest and maybe even reading up on new cranberry recipes!
Fall (September-November)
Fall is the season when all your hard work pays off! As temperatures cool, watch those berries transform from white to deep red – it’s like nature’s own light show. After harvest, don’t just forget about your patch – this is the perfect time for that important sand top dressing that helps prevent disease next season. Keep collecting fallen leaves from around your plants – they can harbor fungal spores if left in place. This is also the time to take notes about what worked well this season while it’s fresh in your mind.
Consider taking photos of your patch to document its progress – they’re great for comparing year to year. Fall is also the perfect time to prepare for winter protection – gather your mulching materials before the first freeze hits. Those last warm days are ideal for cleaning and storing your harvesting tools until next season.
Winter (December-February)
Winter might seem quiet in the cranberry patch, but there’s still plenty to think about! Your main job now is protecting those precious vines from winter damage. A good layer of winter mulch is like tucking your plants in with a cozy blanket – pine needles or straw work great. Don’t panic if your vines turn a bit reddish-purple – it’s their natural winter color!
During winter thaws, check that your mulch hasn’t blown away or shifted. This is also the perfect time for garden planning – curl up with some seed catalogs and dream about expanding your patch in spring. Keep monitoring for animal damage – some critters like to burrow under the snow. Winter is ideal for maintaining your tools, ordering supplies for spring, and maybe even taking an online course about fruit growing!
Troubleshooting Guide
Common Issues:
- Yellow Leaves
- Cause: Usually pH issues or nutrient deficiency
- Solution: Test soil and adjust pH; add acidic fertilizer if needed
- No Fruit Production
- Cause: Insufficient sunlight or over-fertilization
- Solution: Ensure 6-8 hours of sun; reduce fertilizer
- Dying Plants
- Cause: Often root rot from poor drainage
- Solution: Improve drainage; consider rebuilding bed
- Poor Growth
- Cause: Incorrect soil pH or composition
- Solution: Test and amend soil; add peat moss if needed
Remember: Cranberries are a long-term investment in your garden. They take 2-3 years to establish but can produce fruit for decades with proper care. Start small, be patient, and enjoy the learning process!