
Did you know that black garlic isn’t just ridiculously delicious—it’s also packed with twice the antioxidants of regular garlic? That means these black garlic truffle are basically a health food… right? (Let’s just go with it.) We’ve been growing our own elephant garlic for years, nurturing each giant clove with organic principles—no chemicals, just rich soil, patience, and a whole lot of love. And when those beauties are ready, we slowly transform them into something extraordinary: our very own black garlic, aged to perfection right here on the farm.
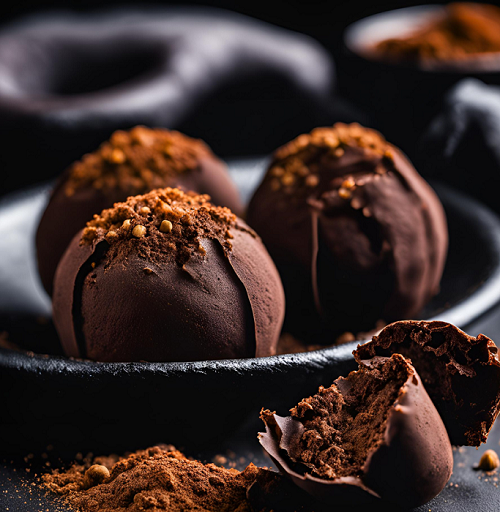
Now, take that deep, caramelized, umami-packed treasure and imagine it dancing with silky dark chocolate. Sounds a little wild? Maybe. But trust me—this is a love story worth tasting. The black garlic’s molasses-like sweetness melts into the chocolate, creating a truffle so rich, so complex, it could make a French chocolatier weep. It’s indulgence with a twist, a treat that surprises you with every bite.
And because I know you love a good deep dive into the magic of fermentation, I highly recommend The Noma Guide to Fermentation—it’s basically the love letter to all things aged and alchemized. But first, let’s get a little hands-on with some chocolate and create something that feels like pure romance in a bite. Ready? Let’s make some truffles!
What is Black Garlic and Why Use It in Truffles?
Black garlic is what happens when time slows down and something ordinary transforms into something extraordinary. It starts as fresh garlic—humble, sharp, full of bite. But after weeks of gentle warmth and patience, it mellows into something entirely different: soft, jet-black cloves with a deep, almost mysterious sweetness. Think aged balsamic, dried figs, a whisper of tamarind. No sharp edges, just smooth, rich umami wrapped in caramel-like complexity.
This ancient ingredient has been cherished in Korea, Japan, and Thailand for centuries, not just for its flavor but for its health benefits. Twice the antioxidants of regular garlic, whispers of immune-boosting properties—some even call it a superfood. But here’s where things get really interesting: that deep, molasses-like sweetness isn’t just for savory dishes. Pair it with dark chocolate, and suddenly, you have something magical. The earthiness of black garlic deepens the chocolate, making each bite more complex, more luxurious—like a love story between fermentation and French patisserie.
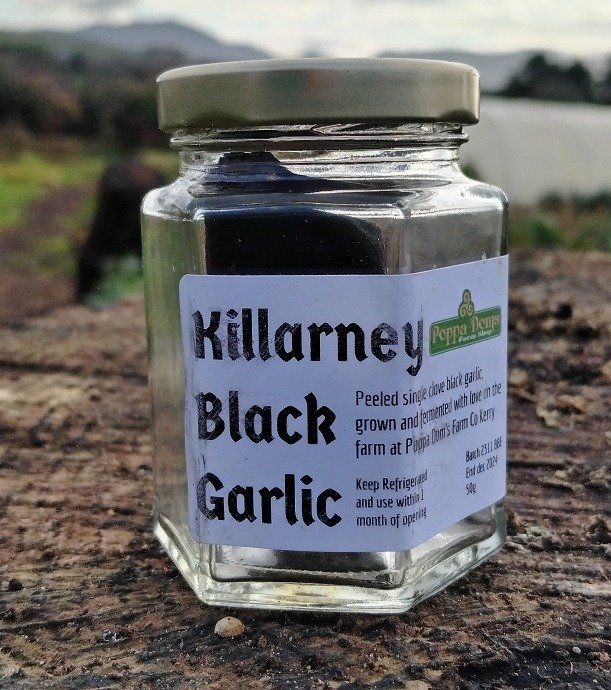
And the best part? You can make it yourself. We craft our own black garlic right here on the farm, using elephant garlic we’ve grown with organic principles—chemical-free from soil to final bite. If you’d like to try your hand at it, here’s our complete guide on black garlic at home. A fermenter makes the process effortless, and this one is perfect for beginners and enthusiasts alike.
For an even deeper dive into black garlic’s world, Black Garlic: Exploring Its Culinary and Medicinal Benefits is a fantastic read. But for now, let’s turn this velvety, umami-packed treasure into something truly decadent—truffles await.
Essential Ingredients & Equipment for black garlic truffle
Now, let’s set the stage for some chocolate alchemy. Making truffles isn’t just about mixing ingredients—it’s about creating tiny bites of indulgence, where texture, flavor, and just the right amount of magic come together. So, let’s talk about what you’ll need to turn your kitchen into a little chocolatier’s haven.
The Ingredients
First things first: the chocolate. This is where you want to be a little picky. A good truffle starts with high-quality dark chocolate, ideally 65-70% cacao, for that perfect bittersweet balance. This is not the time for the half-melted chocolate chips hiding in the back of the pantry. Go for something smooth, rich, and luxurious—Lindt and J.D. Gross (the Peruvian dark chocolate) work beautifully, but any premium bar that melts like a dream will do.
And then, of course, there’s black garlic—our secret ingredient. You’ll want bulbs that are soft but not mushy, like a perfectly ripe fig. When you peel back the papery skin, the cloves should be deep, ebony black, smooth, and slightly sticky. That’s the good stuff—the kind that will melt seamlessly into the chocolate, adding a rich, molasses-like depth that will make people say, Wait… what is that flavor? (In the best way possible.)

To elevate things further, we’ll add just a pinch of flaky sea salt and, if you’re feeling adventurous, a whisper of cinnamon or cardamom—both bring out the warmth and complexity of black garlic beautifully.
The Equipment
Nothing fancy, just a few essentials:
- A double boiler (or a heat-safe bowl perched over a pot of simmering water) for melting your chocolate gently
- A rubber spatula for stirring with care
- Parchment paper to keep things neat
- A small cookie scoop or melon baller to make perfect little truffle rounds (but honestly, your hands work just as well)
Once your truffles are ready, store them in an airtight container in the fridge—they’ll keep for up to two weeks (if you don’t eat them all first).
Bonus tip: Let them sit at room temperature for 15 minutes before serving for that irresistibly smooth, melt-in-your-mouth texture. Trust me, it’s worth the wait.
Step-by-Step Black Garlic Truffle Making Process
Alright, time to roll up your sleeves and get a little chocolate on your hands—because let’s be honest, that’s half the fun. Making truffles might sound like something best left to French chocolatiers in white aprons, but trust me, with a little patience (and maybe a sneaky taste test along the way), you’ll have a batch of velvety, melt-in-your-mouth perfection in no time.
Step 1: The Magic of Black Garlic Paste
First, we need to turn those sticky-sweet black garlic cloves into a luscious paste. You’ll want 4-5 soft cloves—peel them and mash them with the back of a fork until they’re smooth, like softened butter. I personally prefer my little ‘Ninja’ food processor as the texture get way more even in less than half the time.
Step 2: The Chocolate Alchemy
Tempering chocolate has a reputation for being fussy, but we’re keeping things simple. Chop up 150g (5.3 oz) of dark chocolate (about ¾ of your total 200g (7 oz) chocolate) into fine pieces (think chocolate confetti) and melt it slowly over a double boiler, stirring gently until it reaches 46°C (115°F) (or, if you’re going by feel, it should be warm but not scalding to the touch). Once melted, take it off the heat, stir in the remaining 50g (1.7 oz) of chocolate, and keep mixing until smooth and glossy—this “seeding” method gives your chocolate that perfect snap and shine.
Step 3: The Silky Ganache
Warm 120ml (½ cup) of heavy cream until tiny bubbles form around the edges (don’t let it boil—we’re making truffles, not soup!). Pour it over your tempered chocolate and black garlic paste, then stir slowly from the center outward. When it transforms into a luxurious, silky ganache, resist the urge to dive in with a spoon and pop it into the fridge for about 2 hours, until it’s firm enough to scoop.
Step 4: Truffle Time!
Now for the fun part—rolling. Use a melon baller or spoon to scoop out little portions, then roll them quickly between your palms. If they start melting into your hands (we’ve all been there), pop them back in the fridge for 10 minutes before continuing.
Troubleshooting Tips:
- Too soft to roll? It just needs more chill time.
- Too firm? Let it rest at room temp for 5-10 minutes.
- Grainy chocolate? That means it got too hot. No worries—you can still use it for the centers and just dip them in a fresh batch of tempered chocolate for the coating.
- Fingerprints on your truffles? Wear food-safe gloves or chill your hands under cold water before rolling.
- And remember: even the most rustic-looking truffles taste divine. A light dusting of cocoa powder can hide a multitude of sins!
Want to see the process in action? This video gives a great visual guide to rolling and coating truffles like a pro. Now, let’s get rolling!
Flavor Variations & Pairings
Let’s take these truffles from divine to downright legendary. The rich, molasses-like depth of black garlic already gives them an edge, but a few thoughtful twists can elevate them even further.
A pinch of smoked sea salt teases out those deep caramelized notes, while a touch of cardamom adds a whisper of spice that lingers just long enough to keep you reaching for another. Want to turn up the decadence? Infuse your cream with a split vanilla bean or stir in a dash of espresso powder—both play beautifully with black garlic’s umami magic. And for those who like their chocolate with a hint of mischief, a splash of aged bourbon or port in the ganache works wonders, rounding out the flavors with a warm, velvety finish.
Now, let’s talk drinks. These aren’t your average chocolate truffles, so step away from the basic wine pairing! A bold, aged tawny port enhances the dark fruit and caramel tones, while a peaty single-malt scotch brings out the truffle’s smoky depth. For a non-alcoholic pairing that feels just as indulgent, Vietnamese coffee or a roasted oolong tea make for sophisticated sipping companions—think deep, toasty, and slightly floral, just like your favorite high-end chocolate salon.
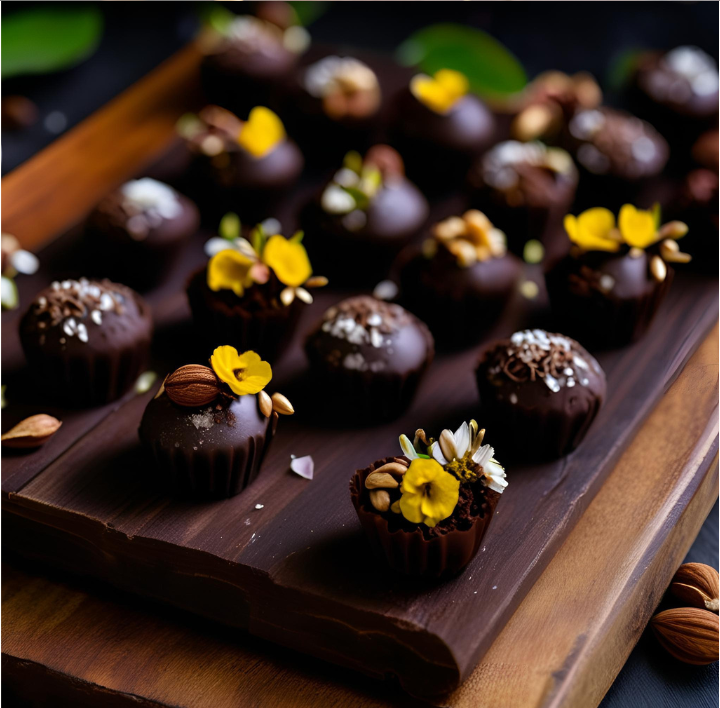
When it comes to serving, make it a moment. Arrange these beauties on a slate board or dark ceramic plate—the contrast makes them pop. For an interactive twist, set up a “tasting board” with garnishes: crushed pistachios, edible gold leaf (for the fancy occasions), or delicate dried rose petals for a touch of romance. And here’s a little chef’s trick: keep a small bowl of flaky sea salt nearby so guests can add that perfect final flourish.
Finally, let’s talk storage—because truffles this good deserve a little TLC. Store them in an airtight container lined with parchment paper in the fridge, where they’ll keep their luxurious texture for up to two weeks. If stacking, be gentle—these gems are delicate! For that perfect, melt-in-your-mouth experience, let them rest at room temperature for 15-20 minutes before serving. But be warned—leave them out too long on a warm day, and you’ll have the most deliciously messy situation on your hands!
The Secret to Perfect Truffles
The key to extraordinary truffles lies in two things: top-quality ingredients and careful technique. Trust me—I’ve had my fair share of split ganache disasters and oddly shaped truffles before cracking the code! Follow these steps, and you’ll create truffles so luxurious, they’ll feel like tiny bites of edible gold.
What You’ll Need
For the Truffles:
- 200g (1 1/4 cups) dark chocolate (70% cocoa), finely chopped
- 100ml (scant 1/2 cup) heavy cream (35% fat minimum)
- 4 cloves black garlic, peeled
- 30g (2 tbsp) unsalted butter, room temperature, cubed
- 50g (1/2 cup) high-quality cocoa powder (for coating)
- Pinch of sea salt
Kitchen Equipment:
- Double boiler or heatproof bowl over a saucepan
- Rubber spatula
- Fine mesh strainer
- Digital thermometer (optional but helpful)
- Small cookie scoop or melon baller (optional)
- Parchment paper
- Shallow dish for cocoa powder
The Step-by-Step Process
1. Prepare Your Ingredients (Mise en Place)
Before you begin, get everything ready. There’s nothing worse than scrambling for a spatula while your chocolate is seizing! Finely chop the chocolate, mash your black garlic into a paste, and measure everything out. Truffle-making is all about precision.
2. Creating the Silkiest Ganache
This is where the magic happens. The secret to smooth, luscious ganache? Control your temperature and timing.
- Heat the cream to precisely 82-85°C (180-185°F)—any hotter, and your ganache may split.
- Pour the hot cream over your chopped chocolate and let it sit for exactly one minute before stirring. Patience is key!
- Stir gently from the center, gradually working outward until smooth and glossy.
- Add in the room-temperature butter and black garlic paste, stirring until fully incorporated. Watch as the ganache transforms into something truly decadent.
3. Shaping the Truffles
Once your ganache has set (about 2-3 hours in the fridge), it’s time to shape your truffles. Here’s the trick: work in small batches and keep everything cold. Your hands will warm up the mixture quickly, so roll fast, then pop them back in the fridge if they get too soft.
Troubleshooting Common Issues
Split Ganache?
- Don’t panic! Gently warm it over a double boiler while stirring constantly. Add a splash of warm cream to help bring it back together.
Ganache Too Firm?
- Let it sit at room temperature, checking every 5 minutes. Avoid microwaving—it can heat unevenly and ruin the texture.
Misshapen Truffles?
- If they’re looking a little rustic, chill them for 10 minutes, then re-roll. Perfection takes patience!
Storage & Serving
These truffles keep beautifully in the fridge for up to two weeks, but let’s be real—they won’t last that long! Store them in an airtight container lined with parchment paper to maintain their delicate texture. For the ultimate flavor experience, bring them to room temperature for 15-20 minutes before serving. In fact, they taste even better after 48 hours, when the flavors have fully developed. So, if you can resist eating them all immediately, you’re in for an even richer treat the next day!
Final Thoughts
Making these black garlic truffles is more than just following a recipe – it’s an experience in chocolate craftsmanship. Yes, they require a bit more effort than your average truffle, but trust me, the result is worth every minute. The combination of rich dark chocolate and complex black garlic creates something truly special that will surprise and delight even the most discerning palates.
Have you ever experimented with unusual flavor combinations in your chocolate making? I’d love to hear about your adventures in the comments below! And if you try these truffles, don’t forget to tag your creations with #BlackGarlicTruffles – I’m always excited to see your results!
Recipe yields 20-24 truffles, depending on size. Perfect for gifting (if you can bear to part with them!)