
Master the art of homemade spanakopita with this traditional Greek recipe. Learn expert tips for creating flaky phyllo layers filled with perfectly seasoned spinach and feta cheese.

Did you know that spanakopita, the iconic spinach pie, has graced Greek tables since the days of the Ottoman Empire? It’s more than just a dish – it’s a bite of history wrapped in golden, flaky phyllo and brimming with the Mediterranean’s signature flavors. This timeless recipe speaks to the Greek knack for transforming simple ingredients into something utterly irresistible.
As a home cook navigating the challenge of feeding two little ones who greet leafy greens with suspicion, I’ve learned to get creative. Recipes like spanakopita feel like a triumph – crunchy, buttery parcels that pack a secret healthy punch and (miraculously) leave no complaints or leftovers.
My love affair with this dish began long before I started cooking. Strangely enough, it wasn’t in Greece but back home in Bavaria. Greek restaurants dotted the landscape where I grew up, their menus brimming with Mediterranean comfort. Spanakopita quickly became a favorite, and every bite of it now takes me back to those teenage years. Living in the West of Ireland, where authentic Greek cuisine is harder to come by, this recipe is my little homage to a cuisine I’ve always adored.
Whether you’re craving the sun-kissed flavors of Greece or simply looking to impress at your next dinner gathering, this recipe will guide you through creating spanakopita that’s every bit as good as the ones served in cozy Greek tavernas.


Some of the links in this post are affiliate links, including links to products on Amazon. This means if you click and make a purchase, I may earn a small commission at no extra cost to you. I only recommend items I genuinely love and believe could add value to your life. Thank you for supporting this blog—it helps keep the content free and full of ideas just for you!
Essential Ingredients for Traditional Spanakopita
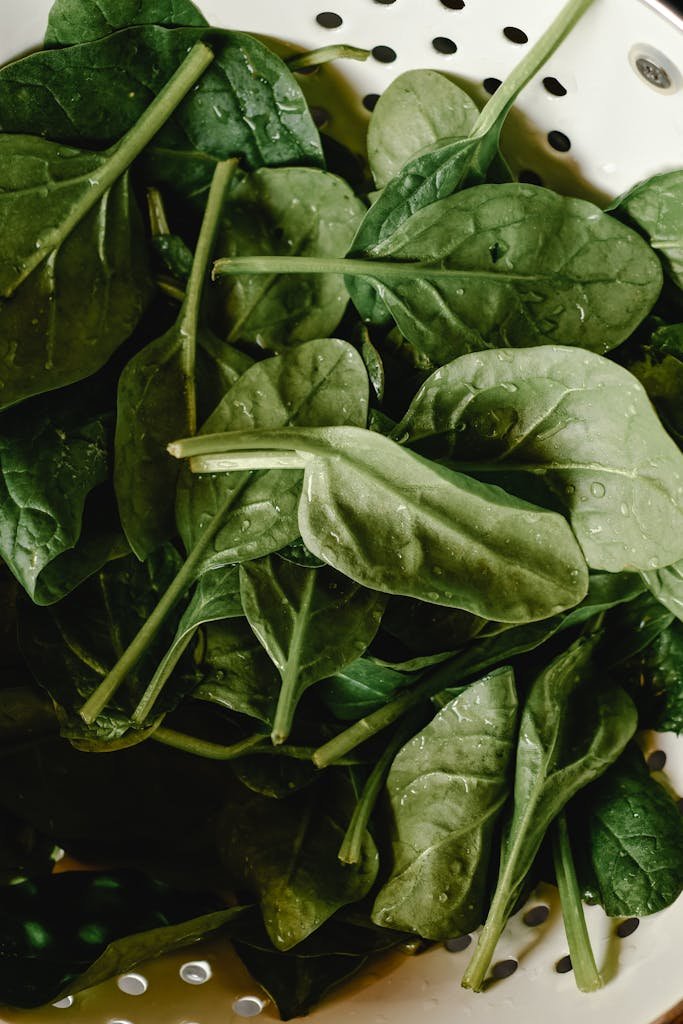
Let’s talk about what makes spanakopita truly unforgettable! The soul of this dish starts with the spinach – fresh spinach, best bought from your local farmer or grown yourself, offers a vibrant flavor and texture, but frozen spinach works wonders in a pinch. Just make sure to drain it thoroughly (trust me, soggy phyllo is not what you’re going for). A quick squeeze in a clean kitchen towel will do the trick!
Next up, feta. For that creamy, tangy kick, opt for authentic Greek feta made from sheep’s milk. It has a richness and depth that cow’s milk feta simply can’t match. Pair that with high-quality phyllo dough – the kind that’s paper-thin and bakes up shatteringly crisp. It’s worth the extra few coins for those perfect golden layers.
And then there’s olive oil – the unsung hero of spanakopita. A good olive oil ties it all together, brushing each phyllo layer with a luxurious finish. I recommend this cold-pressed extra virgin olive oil for a smooth, buttery taste or this Greek olive oil straight from Crete for an authentic touch. If you’re after versatility, this organic olive oil is excellent for cooking, baking, and drizzling.
For that iconic Greek flavor profile, fresh dill is a must, alongside a handful of parsley and a pinch of nutmeg. Want to make it your own? Try adding a dollop of ricotta for extra creaminess or some sautéed leeks and spring onions for a hint of sweetness. The key is balance – let each ingredient sing without stealing the spotlight.


Preparing the Spinach Filling
Let’s roll up our sleeves and dive into the heart of spanakopita – the filling! If you’re using fresh spinach (and I hope you are!), start with a quick cold rinse to wash away any grit. A salad spinner is a lifesaver here for drying small batches – no one wants soggy phyllo! Spread the leaves on clean kitchen towels for an extra layer of moisture control.
Next, let’s build flavor. Finely dice an onion (a sharp chef’s knife like this one from Amazon makes the job a breeze) and sauté it in olive oil over medium heat until soft and translucent – about 8 minutes. Add garlic in the last minute, but be careful! Garlic burns quickly. To save time, try this electric garlic crusher and food chopper – it’s USB rechargeable and powerful enough to handle onions too.
Once your aromatics are ready, wilt the spinach in batches, stirring gently to cook it down evenly. When everything is beautifully wilted, let it cool completely before squeezing out every last drop of liquid – this step is key to keeping your phyllo crisp.
Now comes the fun part: mixing! Combine the spinach with crumbled feta, beaten eggs, and freshly chopped herbs like dill and parsley (a trusty herb knife like this one can be a game-changer). The filling should be moist yet light, holding together when pressed. If it’s too wet, add a sprinkle of breadcrumbs; too dry, another egg will do the trick.
With everything perfectly balanced, your filling is ready to bring your spanakopita to life – one crispy, golden bite at a time!

Mastering Phyllo Dough Techniques
Let’s tackle the trickiest part of spanakopita – working with phyllo dough!
First things first, proper thawing is crucial (and I learned this the hard way, trust me). Move your phyllo from freezer to fridge the night before, then let it sit at room temperature for about an hour before using.
Here’s a game-changing tip: once you open that package, cover the sheets with a slightly damp kitchen towel, then a dry one on top – this prevents the dreaded drying out while you work, because if they dry out, they will break easily. You’ll want to handle these delicate sheets like they’re made of gold! Work quickly but gently, and don’t panic if a few sheets tear – you can patch them together, and nobody will ever know.
Now, let’s talk about that all-important brushing technique: use a soft pastry brush and work from the edges inward with gentle strokes. I personally like to use unsalted butter, but if you’re going traditional (or vegan), extra virgin olive oil works beautifully too. Just remember – less is more! Too much butter or oil will make your phyllo soggy instead of crispy.
The biggest mistake you can make, you ask. People rushing the process. Take your time, make sure each layer gets its moment of buttery attention, and don’t skip layers thinking nobody will notice – they will! For the best results, keep your brushing consistent and your layers even, and your spanakopita will come out of the oven with that gorgeous, flaky, golden-brown top that makes everyone go “Wow!”


Assembly and Shaping Methods
Ready to channel your inner spanakopita-folding pro?
Let’s start with the classic triangle method – it’s like origami, but way tastier! Begin with a strip of phyllo about 3 inches wide, place a tablespoon of filling at one end, and fold it up like a flag. Keep those folds tight and neat – no loose corners! These little triangles are perfect for parties, but I’ll admit, when I’m cooking for the family, I take the easier route: the casserole method.
Grab your trusty 9×13 pan (like this one I love from Amazon) and layer six sheets of phyllo on the bottom, brushing each with butter or olive oil. Let the edges hang over slightly – we’ll put those to good use later! Add your spinach-feta filling, smoothing it out evenly, then layer six more sheets on top, brushing each one as you go.
Here’s my signature trick for that crowd-pleasing top layer: crinkle each phyllo sheet ever so slightly as you layer it. This creates gorgeous golden peaks and valleys that look almost too good to eat (almost). Before popping it into the oven, score the top layers into squares or diamonds using a sharp serrated knife like this must-have from Amazon. Scoring not only helps with portioning but also prevents the phyllo from cracking during baking.
And here’s the crucial final touch: tuck those overhanging edges down into the pan. Trust me, this step creates that crunchy, golden crust that everyone will fight over! Once baked, let your spanakopita cool for 10 minutes, then slice it gently with your serrated knife – no pressing down hard, or you’ll lose those beautifully flaky layers we worked so hard to create.
Baking Tips for Perfect Results
Ready to transform your masterpiece into golden, flaky perfection? Here’s the secret to that Instagram-worthy finish!
Preheat your oven to 375°F (190°C) – and I mean really preheat it. Give it a good 15 minutes after it beeps to ensure even heat distribution. Before popping your spanakopita in, brush the top with one final, loving coat of butter or olive oil (this is what gives you that drool-worthy golden color!).
Now, patience is key – we’re looking at about 45-50 minutes of baking time, rotate the pan halfway through for even browning. You’ll know it’s ready when the top is a deep golden brown and you can hear a subtle crackling sound from the phyllo (music to a baker’s ears!). If the top is browning too quickly but the middle layers aren’t quite done, tent it loosely with foil. Here comes the hardest part – you must (I repeat, must!) let it cool for at least 15-20 minutes before cutting.
Trust me, this resting time lets the filling set and prevents the dreaded filling cascade! Serving it slightly warm is pure heaven, but room temperature is perfectly traditional too.
Got leftovers? Store them in an airtight container in the fridge for up to 3 days, but here’s the game-changer for reheating: pop it in a 350°F oven for 10-15 minutes instead of using the microwave. This brings back that wonderful crispy texture that makes spanakopita so irresistible!
The key is maintaining the right balance of filling to phyllo and ensuring your layers stay crispy. Now that you have all the insider tips, it’s time to head to the kitchen and start creating your own authentic Greek masterpiece. Καλή όρεξη (Bon appétit)!

Spanakopita Triangles
(Greek Spinach and Feta Pastries)
Prep Time: 1 hour
Cook Time: 25 minutes
Yield: About 20 triangles
Servings: 6-7 (3 triangles per person)
Ingredients
Filling
- 900g fresh spinach, chopped (or 500g frozen spinach, thawed and drained)
- 150g onion (1 large), finely chopped
- 12g garlic (4 cloves), minced
- 30g fresh dill, chopped
- 15g fresh parsley, chopped
- 200g feta cheese, crumbled
- 200g eggs (4 large), beaten
- 45ml olive oil
- 1/4 teaspoon ground nutmeg
- Salt and black pepper to taste
Pastry
- 270g phyllo dough (1 pack), thawed
- 115g unsalted butter, melted
- Sesame seeds for garnish (optional)
Instructions
Prepare the Filling:
- If using fresh spinach, blanch in boiling water for 1 minute, drain, and squeeze out excess water.
- Heat olive oil in a large pan over medium heat.
- Sauté onions until translucent (5-7 minutes).
- Add garlic and cook for 1 minute more.
- Mix in spinach, dill, and parsley.
- Remove from heat and let cool for 10 minutes.
- Mix in feta, beaten eggs, nutmeg, salt, and pepper.
Prepare for Assembly:
- Preheat oven to 190°C.
- Line two baking sheets with parchment paper.
- Unroll phyllo and cover with a damp kitchen towel to prevent drying.
Shape the Triangles:
- Take one sheet of phyllo and place it on a clean work surface.
- Brush lightly with melted butter.
- Cut the sheet lengthwise into 3 equal strips.
- Place 1 heaped tablespoon (about 30g) of filling at the bottom end of each strip.
- To fold triangles:
- Fold the bottom corner up diagonally to create a triangle.
- Fold the triangle up, maintaining the triangle shape.
- Continue folding like a flag, maintaining the triangle shape.
- Brush the final end with butter to seal.
- Place seam-side down on the prepared baking sheet.
Finish and Bake:
- Brush tops with melted butter.
- Sprinkle with sesame seeds if using.
- Bake for 20-25 minutes until golden brown.
Tips
- Keep unused phyllo covered at all times to prevent drying.
- Each triangle should contain about 30g of filling.
- The folded triangles should be roughly 9-10cm on each side.
- For even browning, rotate baking sheets halfway through.
- Allow triangles to cool for 5 minutes before serving.
Storage
- Store baked triangles in an airtight container for up to 3 days.
- To freeze unbaked triangles:
- Place on a baking sheet in a single layer until frozen solid.
- Transfer to a freezer bag.
- Bake straight from frozen, adding 5-7 minutes to cooking time.
Serving Suggestions
Accompany with tzatziki sauce or lemon wedges.
Serve hot or at room temperature.
Garnish with fresh dill.