Learning how to make garlic braids has become one of our favourite summer traditions. Even the kids love getting involved—from picking herbs and flowers in the garden to choosing the prettiest blooms to tuck into each braid. It starts with a little foraging adventure, baskets in hand, giggles echoing through the rows, and somehow it always ends with good music, busy hands, and the kind of chats that only happen when no one’s looking you straight in the eye.
Once the garlic is harvested and cured, we gather at the table, roll up our sleeves, and get to work. There’s a rhythm to it—twist, tuck, loop, laugh—and before long, our kitchen is full of braided strands, fragrant and beautiful, ready to hang.
Making garlic braids isn’t just practical (though it’s a wonderful way to store your harvest), it’s also a way to slow down and mark the season. And when we decorate them with fresh herbs, dried flowers, or even little snippets of twine bows, they become something special—perfect for gifts, market stalls, or simply to hang by the pantry door.
It doesn’t take much to get started, and it’s a craft that feels both old-fashioned and endlessly useful. So, if you’ve got softneck garlic ready and some curious little hands nearby, this might just become your new favourite family ritual too.
Ready to braid some garlic? Let’s begin.
What Are Garlic Braids and Why Use Them?
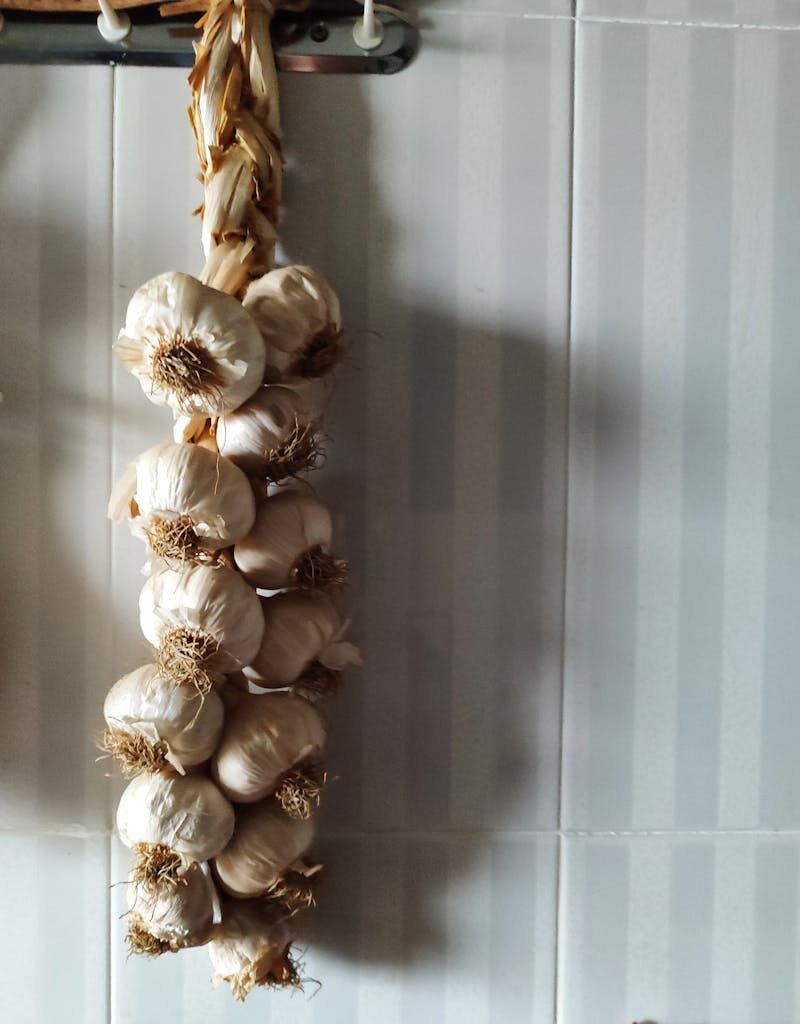
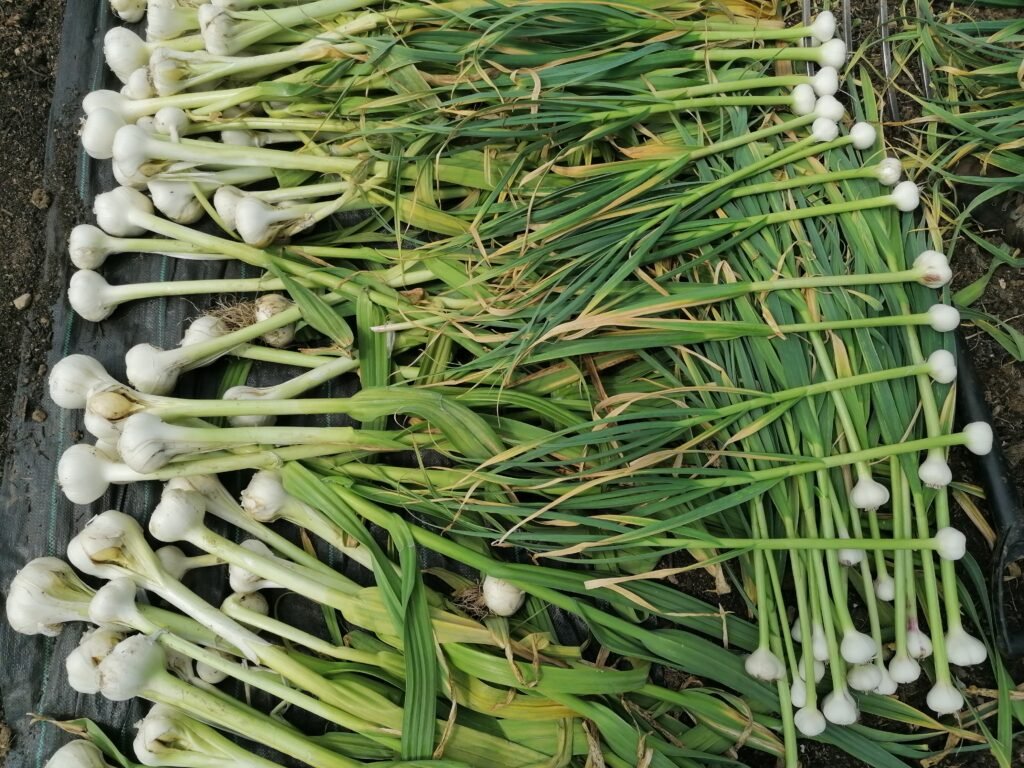
Garlic braids are long, woven strands made by braiding whole garlic bulbs together using the dried-out stalks that grow above each bulb. When you grow your own garlic—or buy it fresh from a farm—you’ll notice it still has a long green top attached.
After harvesting, the garlic is left to cure, which means drying it out slowly in a well-ventilated space. As it cures, those green tops turn golden and papery. Instead of cutting them off like supermarkets do, we keep them on and use them to braid the bulbs together—just like braiding hair! The result is a beautiful and practical rope of garlic that you can hang in your kitchen or pantry.
Braiding garlic has been done for centuries in many cultures, and not just because it looks nice. It helps the bulbs stay fresh longer, thanks to better airflow and also saves space and keeps your garlic off the counter where it might get damp or bruised.
Some folks even say garlic braids help keep pests away, though we mostly love them because they’re useful and lovely at the same time. With the right storage—cool, dry, and out of sunlight—a garlic braid can last several months. So, instead of tossing your stems in the compost, why not turn them into something useful, beautiful, and full of tradition?
Best Garlic Varieties for Braiding
When it comes to making garlic braids, not all garlic is created equal! There are two main types of garlic: softneck and hardneck. The key difference is in their stems. Hardneck garlic grows a stiff, woody stalk up the middle that doesn’t bend well. It’s great for flavour but not so great for braiding. Softneck garlic, on the other hand, has flexible, leafy stems that dry into perfect braiding material. That’s why softneck garlic is the go-to choice for most braiders.
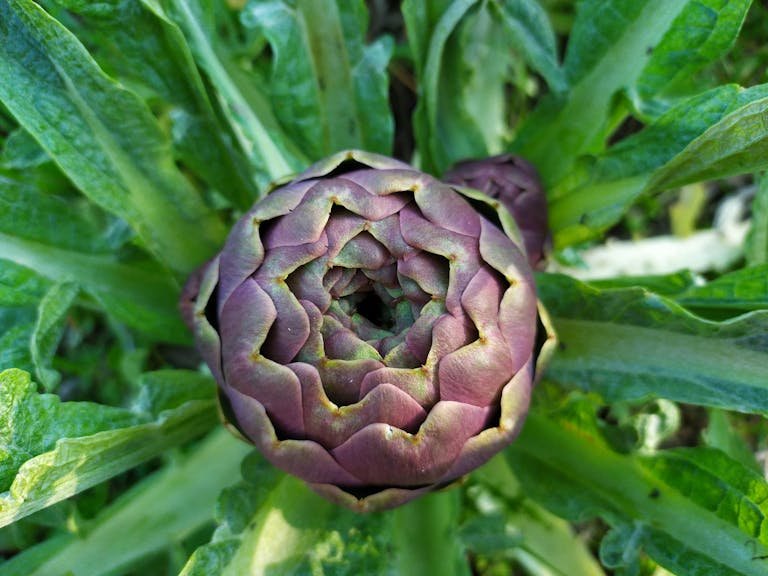
If you’re growing garlic with braiding in mind, look for softneck varieties like Silverskin, Artichoke, or Inchelium Red. These types are not only easier to braid, but they also store well and have a lovely flavour for everyday cooking.
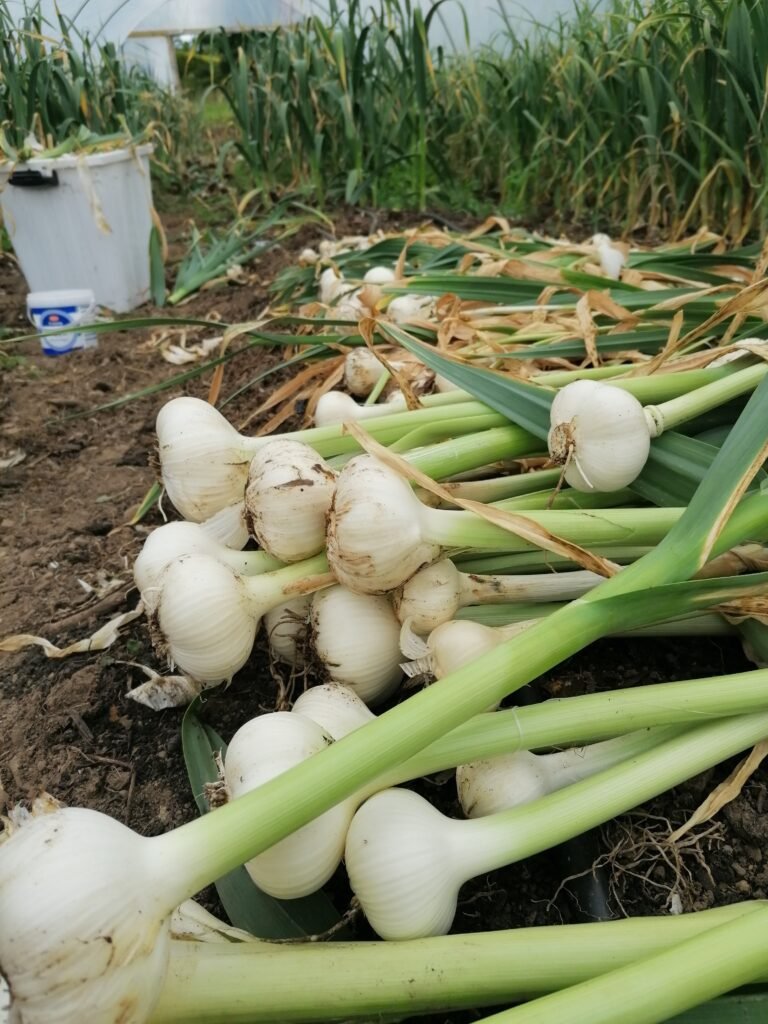
Timing is important, too. Garlic is usually ready to harvest in mid to late summer, depending on when it was planted. You’ll know it’s time when the bottom leaves start to brown but a few green ones still remain. Gently dig it up—don’t pull!—and keep the whole plant, stem and all, intact. Then hang it up in a dry, airy place for a few weeks to cure. Once the stalks are dry and papery, they’ll be strong enough for braiding but still flexible enough to work with.
Choosing the right type of garlic and harvesting it carefully is the first step to making a braid that lasts and looks beautiful too!
How to Cure Garlic Before Braiding
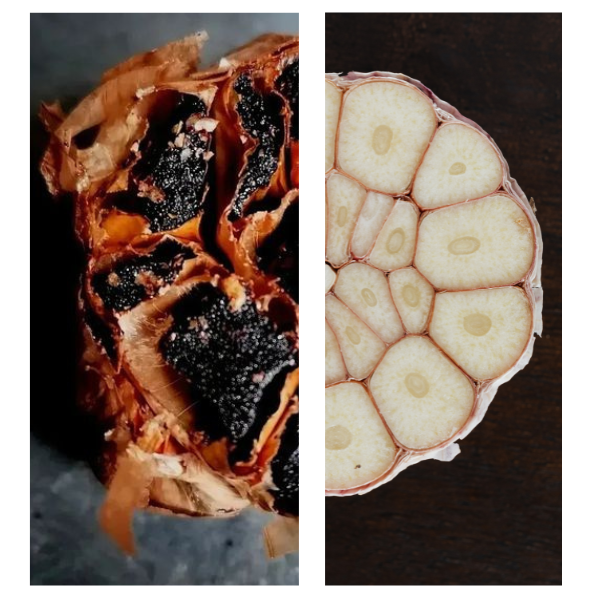
Before you can start braiding, your garlic needs time to cure—and no, not like a ham! Curing garlic means drying it out slowly so it stores better and lasts longer. This step is really important if you want your braid to hang in the kitchen and still give you lovely cloves to cook with for months to come.
Right after harvesting, leave the roots, stems, and skins all intact. Gently brush off excess dirt but skip the washing. Then lay the garlic out or hang it in bunches in a dry, shady spot with good airflow. A shed, barn, or even a well-ventilated porch can work. Keep it out of direct sunlight, which can scorch the bulbs. You’ll want to cure it for about 2 to 4 weeks, depending on your climate. You’ll know it’s ready when the roots are dry and wiry, the stems feel papery, and the skins rustle a bit when touched.
Skipping the curing step means your garlic might go soft, sprout early, or even mould. That’s the last thing you want after putting so much love into growing and harvesting it. Plus, curing makes braiding easier—those stalks need to be dry but still a little bendy, and curing does just that.
If you’d like a more detailed guide on how we cure ours—including tips for our rainy Irish weather—pop over to our full post on How to Cure Garlic for Long-Term Storage.
Different Garlic Braid Styles: Explained with Pros and Cons
1. Three-Strand (Classic) Braid
Explanation:
First up is the traditional three-strand braid — just like braiding hair! You start with three garlic bulbs tied together by their dried stems and cross the outer strands over the middle repeatedly, adding bulbs as you go.
Pros:
- To begin with, it’s simple and beginner-friendly.
- Plus, it has a charming, rustic look.
- Also, it works well with most softneck garlic varieties.
Cons:
- However, it can be a bit loose if not braided tightly.
- And it’s less decorative than some of the other styles.
2. Layered (Step) Braid
Explanation:
Next, there’s the layered or step braid. Here, you braid garlic bulbs in groups or “layers,” creating a fuller and more compact braid. Instead of adding bulbs one at a time, you add a cluster at each stage.
Pros:
- This style creates a thick, eye-catching braid.
- Moreover, it’s great for gifting or decoration.
- And it holds together really well.
Cons:
- On the downside, it’s more time-consuming.
- Plus, it requires careful arranging to keep neat.
3. Four-Strand Braid
Explanation:
Then, we have the four-strand braid, which is a bit more complex. It uses four strands of garlic stems to create a tighter and more intricate pattern than the three-strand braid.
Pros:
- For starters, it makes a firmer and more durable braid.
- In addition, it has an elegant, polished look.
- Also, it keeps the bulbs more secure.
Cons:
- That said, it’s slightly harder to learn.
- And it needs longer, more flexible stems.
4. Fishtail Braid
Explanation:
Finally, there’s the fishtail braid, often used with hardneck garlic because of its stiffer stems. This style uses two main strands and adds bulbs alternately from each side, creating a distinctive woven look.
Pros:
- To start, it’s perfect for short or stiff stems.
- Also, it’s quick to make.
- Plus, it has a unique and attractive style.
Cons:
- However, it’s less common and may look unfamiliar.
- And it’s not as tight as the multi-strand braids.
Step-by-Step Guide: How to Make a Garlic Braid
Making garlic braids is one of those slow, satisfying tasks that turns a humble harvest into something beautiful. Whether you’re braiding a few for the pantry or making decorative ones with flowers and herbs, here’s how to do it—step by step.
Supplies Needed
Let’s start with what you’ll need:
- Cured garlic with stems attached
- Twine or string (jute or cotton is ideal) → [affiliate link]
- Sharp scissors or garden snips → [affiliate link]
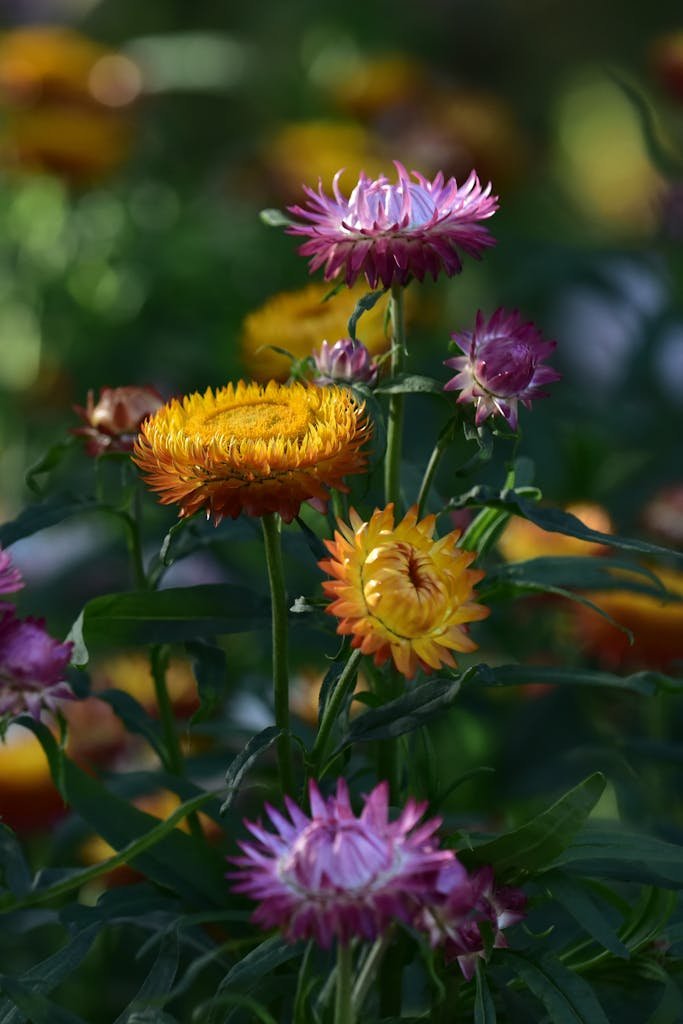
- Optional: dried herbs and flowers like rosemary, thyme, lavender, or calendula → [affiliate link]
Tip: Have a little spray bottle of water on hand just in case the stems feel too dry or stiff.
Prepping Garlic for Braiding
Before you start braiding, your garlic needs to be fully cured. The skin should be dry and papery, and the stems should feel dry but still bendable.
- First, trim the roots to about 1/4 inch.
- Next, gently brush off any dirt. If it’s extra messy, peel off only the outermost skin.
- Then, if the stems are too crispy, mist them lightly and wrap in a damp towel for 30–60 minutes.
This makes the stems easier to work with and helps prevent breakage.
Step-by-Step Instructions for Braiding
Here’s how to braid garlic using different methods. Try the one that suits your style—or learn them all!
simple Three-Strand Braid (Beginner-Friendly)
This one is easiest and great for getting started.
- First, gather three garlic bulbs with stems pointing up.
- Cross the right stem over the middle, then the left over the new middle.
- As you go, add a new bulb behind the braid each time you cross a stem.
- Keep braiding until all your garlic is included.
- Finally, tie the top tightly with twine and make a loop for hanging.
👍 Pros: Easy to learn, quick to finish
👎 Cons: Best for softneck garlic and uniform bulbs
Four-Strand Braid (A Bit Fancier)
If you want a braid that’s a bit more polished, try this one.
- Begin with four garlic bulbs, laid out like a fan.
- Label the stems from 1 (left) to 4 (right).
- Move strand 1 over strand 2, under strand 3, and over strand 4.
- Then, relabel and repeat.
- As with the three-strand, keep adding bulbs behind the braid.
👍 Pros: Looks fancy and elegant
👎 Cons: A bit harder to keep neat at first
Layered or Step Braid (Showstopper)
This style is perfect for gifts or market displays.
- First, start like the three-strand braid.
- Instead of folding new bulbs into the braid, layer them behind, in a staggered pattern.
- Each new bulb goes slightly higher than the last, creating a stepped look.
- Then, tuck herbs and flowers into each step as you go.
👍 Pros: Eye-catching and decorative
👎 Cons: Can get bulky—better with smaller bulbs
Fishtail Braid (Beautifully Braided Look)
Lastly, this style is great for a tidy, pretty finish.
- Divide stems into two equal sections.
- Take a thin piece from the outer right and cross it into the left.
- Then take a piece from the outer left and cross into the right.
- Continue, switching sides and adding garlic bulbs near the middle as you go.
- Tie it tightly when finished.
👍 Pros: Very neat and elegant—nice for herbs, too
👎 Cons: Takes a bit more patience
Common Mistakes to Avoid
Even though garlic braiding is fun, a few common hiccups can pop up:
- Too dry? The stems might snap. In that case, mist them lightly and wait a bit.
- Too wet? That can cause mold. Always make sure the garlic is cured.
- Bulbs too uneven? Mix sizes throughout the braid for balance.
- Loose braid? It may fall apart when hung. So, keep your braid snug.
Storing and Displaying Garlic Braids
Once your garlic braid is finished, it’s time to find the perfect place to hang it! Garlic braids are not just useful—they’re beautiful too. But where you store them can make a big difference in how long they last and how well they hold up.
Best places to hang garlic braids (cool, dry, dark areas)
First of all, garlic braids need a home that’s cool, dry, and out of direct sunlight. A pantry, cellar, or shaded corner of the kitchen works great. Hanging them in the open air helps with airflow, which keeps them from getting damp and moldy. Try to avoid places that get warm, like right above the stove or near sunny windows.
Avoiding mold, moisture, and pests
To keep your garlic braid fresh and safe, check it every now and then. If your home gets humid, consider placing a fan nearby to keep air moving. You can also tuck a small sachet of dried herbs or bay leaves in the braid—this not only adds a nice scent but can help deter little pests too!
How long garlic will last in braid form
Properly stored, your garlic braid can last for up to 6–9 months. Some bulbs might start to sprout or soften earlier, so it’s a good idea to use those ones first. Just work your way through the braid from the bottom up.
Creative kitchen and pantry décor ideas using garlic braids
Lastly, garlic braids bring charm to your home. You can hang one beside dried herbs, add small dried flowers for a pop of color, or create a rustic wall display in your kitchen. Some folks even use them as seasonal décor! They’re useful and beautiful—a perfect combo.
Troubleshooting & FAQs
Even though garlic braiding is simple once you get the hang of it, a few common issues can pop up along the way. Don’t worry—we’ve got you covered!
Why your garlic braid might be falling apart
If your braid is coming loose, it’s usually because the stems weren’t dried enough, or they were too brittle. Ideally, garlic stems should be dry but still flexible—like thick paper. If they’re too fresh, they’ll shrink and loosen as they cure. If they’re too dry, they’ll snap instead of bend. Next time, try misting the stems very lightly or wrapping them in a damp towel for an hour before braiding.
Can you braid hardneck garlic?
Technically, yes—but it’s tricky. Hardneck garlic has much stiffer stems that don’t bend easily. You won’t get the same soft, layered look as with softneck varieties. Instead, you can tie the bulbs together with twine or group them in a rustic bundle. It won’t be a braid, but it still looks lovely hanging in a pantry or shed.
Can garlic braids be used for seed garlic next season?
Absolutely! If your garlic was grown organically and harvested at the right time, you can definitely save some for planting. Just choose the biggest, healthiest bulbs from your braid. However, make sure to store them properly so they don’t sprout too early or dry out completely.
How to rebraid or fix a loose braid
If a section loosens or slips, don’t panic. Simply unbraid a little bit, tuck the stem back in, and redo that section. You can also reinforce it with twine or a bit of raffia. Honestly, a rustic look is part of the charm—no need for perfection!
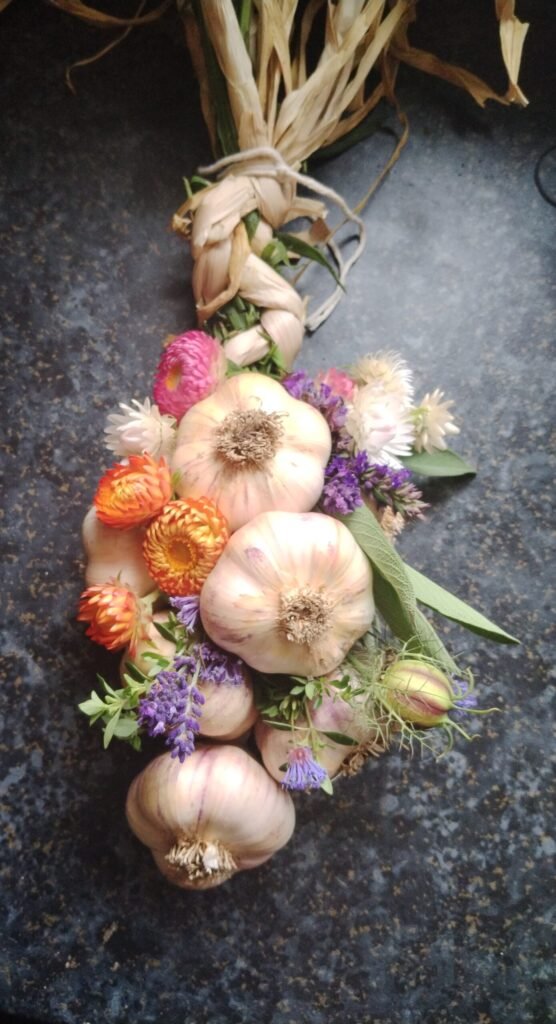
Bonus: Making Decorative Garlic Braids with Herbs & Flowers
Once you’ve mastered a basic braid, why not have a little fun with it? Making decorative garlic braids is one of our favorite seasonal traditions—and even the kids love helping! We usually start by gathering herbs and flowers from the garden. Lavender, rosemary, and even a few dried chili peppers are great choices. The little ones love picking blooms, and it’s a great way to get them involved.
Adding Lavender, Rosemary, Chili, or Dried Flowers for Visual Flair
To begin, simply tuck sprigs of herbs or flowers into the braid as you go. Place them between the garlic bulbs or lay them along the outer edge for a fuller look. Be sure the stems are dry, just like the garlic. You can even secure a few pieces with twine or raffia if needed. It’s amazing how a splash of color from chili or calendula can turn something practical into a small work of art.
How to Balance Aesthetic Elements with Functional Storage
Now, it’s important to keep balance in mind. Too many extras can block airflow, which shortens shelf life. So while it’s tempting to add all the pretty things, keep the core braid airy and light. Stick to herbs that dry well and don’t mold easily—think rosemary, thyme, or sage.
Ideal Herbs and Flowers That Dry Well and Complement Garlic
Some great picks include:
- Lavender (for scent and color)
- Rosemary and thyme (smell amazing in the kitchen)
- Chili peppers (add drama and spice)
- Dried calendula, strawflowers, or statice (they hold their shape beautifully)


Creating Gift-Worthy Garlic Braids for Holidays or Markets
Finally, if you’re planning to gift or sell your braids, consider adding a hand-written tag or natural ribbon. We’ve given these as Christmas gifts, housewarming tokens, and even sold a few at the local market. They’re practical, beautiful, and made with love—what more could you want?
Final Thoughts: From Garden to Braid
There’s something deeply satisfying about turning something you grew with your own two hands into something both useful and beautiful. Garlic braiding is just that—a way to keep your harvest fresh, tidy, and ready to use, while also adding a touch of rustic charm to your home. Once you get the hang of it, you’ll find it’s not just a chore—it’s a little ritual. One that’s easy to share with the kids, especially when music is playing and everyone’s hands are busy. Some of our best chats happen during moments like that.
Even better, braiding your garlic helps it last longer. It keeps the bulbs dry, lets air flow around them, and gives you an easy way to grab a clove when dinner’s bubbling on the stove. And if you get creative with herbs or flowers, you’ve got a homemade gift that’s as thoughtful as it is practical.
But of course, it all starts with growing good garlic. If you’re new to it, don’t worry—garlic is one of the easiest crops to grow, even for beginners. We tuck ours in the ground in autumn, mulch it well, and forget about it until summer. Want to try it for yourself? Take a peek at our full post on how to grow garlic right here.
So whether you’re braiding for storage, beauty, or just the joy of it—know that this small, simple task is part of something much bigger. And that’s something to be proud of.