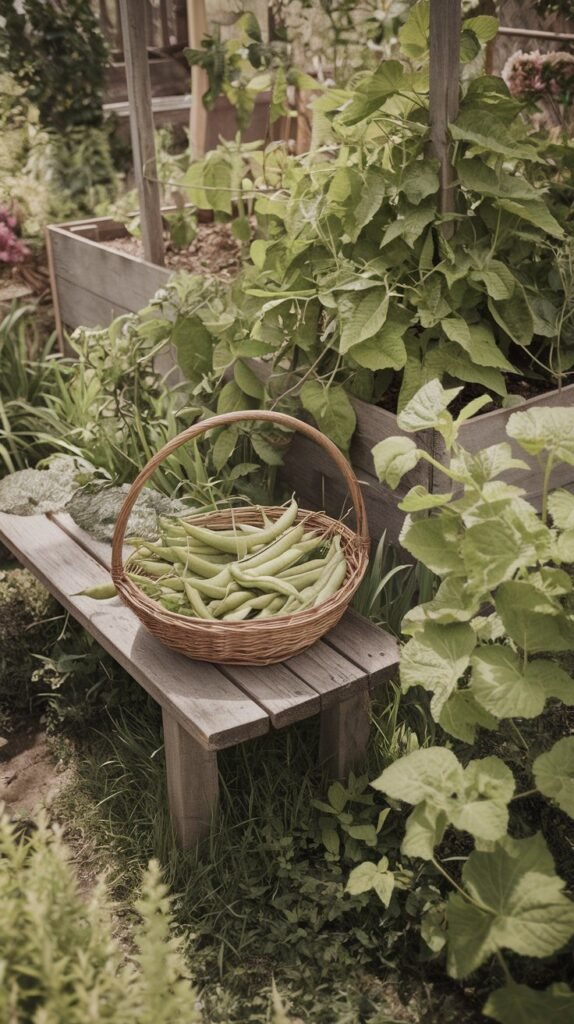
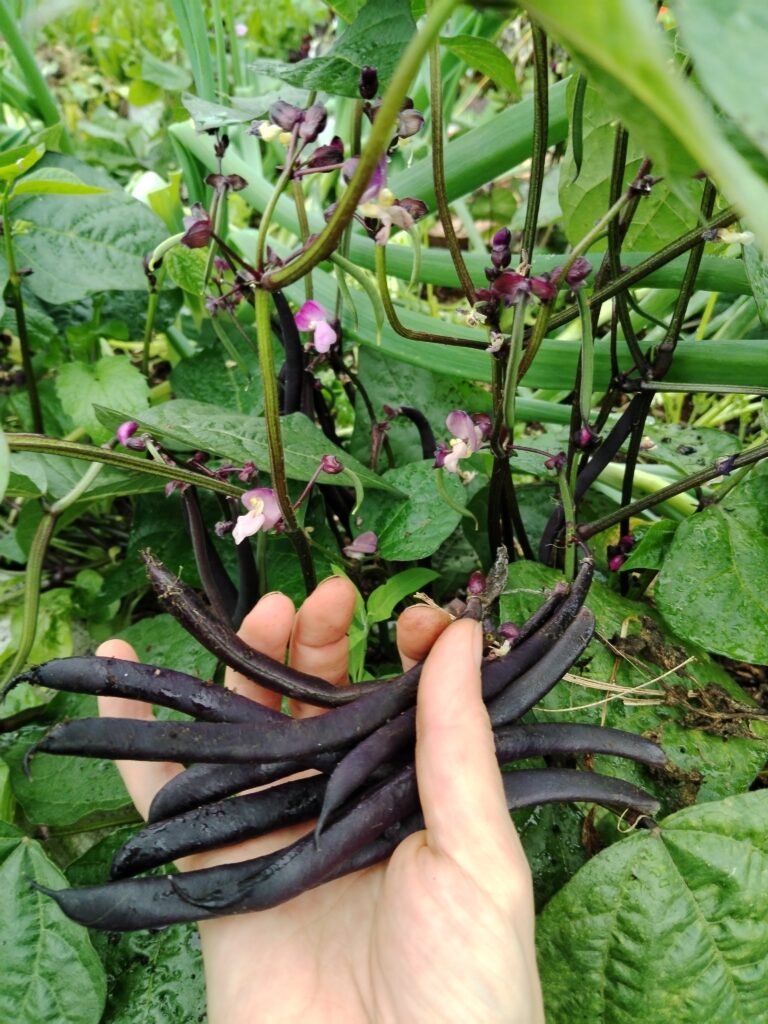
How to grow green beans? It’s easier than you think—and if you’ve ever picked up a bag at the store, you might want to think twice. Green beans are on the Dirty Dozen list, meaning they’re often coated in pesticides when store-bought. But the good news? Growing your own green beans is ridiculously simple, even if you’re short on time, space, or gardening experience.
These little green pods are one of the most rewarding crops for beginners and seasoned gardeners alike. They sprout quickly, grow fast, and keep producing as long as you keep picking. With just a bit of sunshine, well-drained soil, and regular watering, you’ll have basketfuls of crisp, tender beans all summer long—no chemicals required!
Whether you prefer pole beans twining up a trellis or bushy varieties that fit neatly in containers, this guide covers everything from seed to harvest. You’ll also learn organic pest control tricks to keep your crop thriving.
And if you want to know why growing your own beans matters, check out my full post on the Dirty Dozen and how to grow your own clean, chemical-free food.
Let’s get planting—those beans won’t grow themselves!
Some of the links in this post are affiliate links, including links to products on Amazon. This means if you click and make a purchase, I may earn a small commission at no extra cost to you. I only recommend items I genuinely love and believe could add value to your life. Thank you for supporting this blog—it helps keep the content free and full of ideas just for you!
Choosing the Right Green Bean Variety
When it comes to growing green beans, choosing the right variety makes all the difference. First, you’ll need to decide between bush beans and pole beans—both are delicious, but they grow quite differently! Bush beans are compact, don’t need support, and mature quickly, making them perfect for small gardens or container growing. On the other hand, pole beans climb, meaning they require a trellis but produce continuously over a longer period. If you want a steady harvest throughout the season, pole beans might be the way to go.
Beyond growth habit, the variety you choose should suit your climate, space, and taste preferences. For example, if you’re short on space, ‘Provider’ bush beans are a fantastic choice since they thrive in containers. Meanwhile, ‘Blue Lake’ pole beans are a favorite for their sweet flavor and heavy yields. If you’re in a cooler climate, look for fast-maturing varieties like ‘Contender’ to ensure a bountiful harvest before the first frost.
No matter what you choose, fresh green beans straight from the garden always taste better than anything store-bought. So, think about your space, how often you want to harvest, and what works best for your growing conditions—then plant accordingly!
When and Where to Plant Green Beans
Timing is everything when it comes to planting green beans! These warm-season crops despise the cold, so it’s best to wait until all danger of frost has passed and soil temperatures have reached at least 50–60°F (10–16°C). If you plant too early, the seeds might rot in the cold, damp soil instead of sprouting into those crisp, tender beans we all love. In most regions, late spring to early summer is the sweet spot for sowing.
As for location, green beans thrive in full sun, needing at least 6–8 hours of sunlight daily to produce an abundant harvest. Well-draining soil is a must—soggy roots mean trouble! Aim for soil that is loose, rich in organic matter, and slightly acidic to neutral (pH 6.0–7.0). If your soil is heavy or clay-like, consider raised beds or containers to improve drainage and warmth.
Speaking of containers, if space is tight, don’t worry! Bush beans grow beautifully in pots, provided they’re at least 8–12 inches deep. Pole beans, on the other hand, need a trellis or stakes for support, making them better suited for garden beds or larger containers with room to climb. Whether you plant them in the ground or in pots on your balcony, as long as they get warmth, sun, and well-drained soil, you’ll be harvesting fresh beans in no time!
Preparing the Soil for Green Beans
Before planting green beans, setting up the right foundation makes all the difference. These fast-growing legumes aren’t too fussy, but they do best in loose, well-draining soil that’s rich in organic matter. Ideally, aim for a loamy or sandy texture—heavy clay can lead to waterlogged roots, while overly sandy soil may dry out too quickly.
To give your beans the best start, mix in plenty of compost or well-rotted manure before planting. This boosts fertility and improves soil structure, helping retain moisture without becoming compacted. Unlike heavy feeders, green beans don’t need much nitrogen—in fact, too much can lead to lush leaves but fewer beans. Instead, focus on phosphorus and potassium, which encourage flowering and pod production. A light sprinkle of bone meal or wood ash can do the trick!
Good drainage is key, especially if your soil tends to hold water. To prevent soggy conditions, consider raised beds or mounded rows. If planting in containers, use a well-draining potting mix and ensure pots have drainage holes. Healthy roots lead to vigorous plants and bountiful harvests, so a little soil prep now means crisp, delicious beans later!
How to Plant Green Beans from Seed
Planting green beans from seed is one of the easiest and most rewarding gardening tasks. With the right method and a little patience, you’ll have sprouts popping up in no time. Here’s how to do it right!
Step-by-Step Guide to Direct Sowing Green Beans
Unlike some veggies that need an indoor start, green beans prefer to be sown directly into the soil. Here’s how to get started:
- Wait for Warm Soil – Green beans love warmth! Sow seeds after the last frost, when soil temperatures reach at least 60°F (15°C).
- Prepare the Soil – Loosen the top 6 inches and remove any weeds. Add compost for nutrients, but avoid high-nitrogen fertilizers.
- Plant the Seeds – Push seeds 1 inch deep into the soil. Cover them lightly and water gently.
- Keep the Soil Moist – Don’t let the soil dry out during germination. Water regularly, but avoid over-saturating.
- Watch for Sprouts! – With the right conditions, seedlings should emerge in 7–10 days.
Proper Spacing for Bush Beans and Pole Beans
- Bush beans – Space seeds 2–4 inches apart, with rows 18–24 inches apart.
- Pole beans – Space seeds 4–6 inches apart, with rows 30 inches apart. Provide a trellis, teepee, or pole at planting time for support.
Germination Tips and Common Mistakes to Avoid
- Pre-soak tough seeds – If your green bean seeds have an extra-hard coat, soaking them in water for a few hours can speed up germination.
- Don’t plant too early – Cold soil slows germination and can cause seeds to rot.
- Avoid overwatering – Keep the soil moist but not soggy—standing water can cause damping off.
- Thin if needed – If seedlings are too close, thin them to avoid overcrowding and ensure good airflow.
With these tips, your green beans will be off to a strong start!
Watering and Fertilizing Green Beans
Keeping your green beans happy comes down to two simple things: watering correctly and feeding wisely. Too much or too little of either can lead to poor growth or fewer beans. Let’s get it just right!
How Often to Water Green Beans for Maximum Growth
Water is crucial, but green beans don’t like soggy feet. Here’s how to strike the perfect balance:
- Aim for 1 inch of water per week, either from rain or irrigation.
- Deep watering is best – Water at the base of the plants, ensuring moisture reaches the roots.
- Morning watering helps – This prevents fungal issues by allowing the leaves to dry during the day.
- Hot weather? Water more frequently – During heat waves, check the soil daily and water if it’s dry 1 inch below the surface.
Best Fertilizers for Green Beans (Organic vs. Synthetic)
Green beans are light feeders, meaning they don’t require heavy fertilizing. However, a little boost can improve their yield!
- Organic options:
- Compost – Adds nutrients gradually and improves soil health.
- Fish Blood and Bones – Provides a mild nitrogen boost without overfeeding.
- Liquid seaweed – Helps with plant resilience and overall vigor.
Synthetic options:
- A balanced 5-10-10 fertilizer (low nitrogen, higher phosphorus and potassium) can enhance flowering and pod production.
- Apply sparingly—too much nitrogen will lead to leafy vines instead of beans!
Mulching to Retain Moisture and Reduce Weeds
Mulching is a game-changer for green beans! It locks in moisture, blocks weeds, and keeps the soil temperature stable.
Best mulch options:
Straw or dried grass clippings – Suppresses weeds and conserves moisture.
Composted leaves – Adds organic matter as it breaks down.
Wood chips (for pathways) – Keep them away from stems to avoid rot.
Apply mulch once seedlings are a few inches tall, keeping it an inch away from the stems to prevent fungal issues.
Mastering these watering and feeding techniques will keep your green beans lush, productive, and thriving!
Underplanting Green Beans: A Living Mulch Approach
Why let mulch do all the work when you can grow food and protect your soil at the same time? Underplanting with low-growing greens offers multiple benefits:
- Moisture retention – The leafy greens provide ground cover, reducing evaporation just like mulch would.
- Weed suppression – Less open soil means fewer weeds trying to take over.
- Extra harvests – Get more food from the same space by growing shade-tolerant crops beneath your beans.
- Cooler soil temps – Living mulch helps regulate temperature, keeping roots happy in the summer heat.
Best Crops to Underplant with Green Beans
Lettuce – Thrives in the dappled shade of taller bean plants.
Spinach – Loves cooler soil and grows well under bush beans.
Radishes – Quick-growing and won’t compete for nutrients.
Mizuna or arugula – Fast-growing greens that add a peppery kick to salads.
Dwarf nasturtiums – Not just edible, but also attract pollinators and deter pests!
How to Plant for Success
Space wisely – Plant greens in the gaps between bean rows or around the base of pole bean supports.
Start early – Get your greens established before the beans get too tall and shady.
Harvest frequently – Pick greens often to keep them from overcrowding the beans.
This method works beautifully in small gardens, raised beds, or container setups and makes every inch of space work harder for you!
Green Bean Trellises and Support Structures (For Pole Beans)
Pole beans are born climbers, and giving them proper support can make all the difference in their growth, yield, and ease of harvest. Whether you prefer a DIY trellis or a store-bought solution, there’s an option for every garden style and budget.
DIY Trellis Ideas for Pole Beans 🌱
If you love getting creative in the garden, these trellises are simple, effective, and budget-friendly:
- Bamboo Teepees – Tie three to five bamboo stakes together at the top for a rustic, sturdy structure that’s easy to set up.
- Cattle Panel Arch – A walkthrough bean tunnel? Yes, please! Cattle panels bent into an arch create a beautiful, functional trellis that lets beans hang for easy picking.
- String or Net Trellis – Attach garden twine, jute netting, or wire mesh to a wooden frame or between two posts for a lightweight, flexible climbing system.
- Corn as a Natural Trellis – In a Three Sisters Garden setup, pole beans climb corn stalks, eliminating the need for extra support.
Best Store-Bought Trellises for Green Beans
If DIY isn’t your thing, these options work right out of the box:
- Metal obelisks – A stylish, long-lasting choice for containers or raised beds.
- Expandable pea & bean netting – Reusable and adjustable, perfect for small gardens.
- Heavy-duty A-frame trellis – Great for space-saving vertical gardening and easy picking from both sides.
How to Train Green Bean Vines for Better Yield
Pole beans are natural climbers, but a little guidance ensures they grow where you want them to:
- Encourage twining early – Gently wrap young vines around the support structure in a counterclockwise direction (yes, they always twine that way!).
- Regularly check for strays – Any vine that misses the trellis can be redirected by hand.
- Prune excess growth – Snipping off wayward vines encourages stronger fruiting branches.
With the right support, your pole beans will soar, producing tender, delicious pods all season long!
Managing Pests and Diseases in Green Beans
Even the most well-tended green bean patch can attract uninvited guests. Here are the usual suspects and how to handle them:
- Aphids – These tiny sap-suckers multiply fast! A strong spray of water or neem oil knocks them right off.
- Mexican Bean Beetles – They look like ladybugs, but their larvae devour leaves. Hand-picking and floating row covers keep numbers down.
- Spider Mites – Dry conditions encourage these pests, so keeping plants well-watered and misting leaves makes a big difference.
Companion planting with marigolds, nasturtiums, or basil also helps deter pests naturally! 🌸
Preventing Fungal Diseases Like Rust and Powdery Mildew
Fungal diseases thrive in humid, crowded conditions, but a few simple habits keep your plants in the clear:
- Space plants properly – Good airflow prevents moisture buildup.
- Water at the base – Wet leaves = a breeding ground for disease. Always aim for the soil, not the foliage.
- Rotate crops – Growing beans in the same spot each year lets disease linger in the soil. Rotate with other crops like carrots or lettuce.
If fungal issues appear, a homemade spray of diluted milk or baking soda can help slow the spread.
Natural and Organic Pest Control Methods 🌿
If pests get out of hand, reach for natural solutions first:
- Neem oil – Works wonders against soft-bodied insects like aphids.
- Diatomaceous earth – A natural powder that kills crawling pests by dehydrating them.
- Hand-picking – Simple but effective for beetles and larger insects.
- Beneficial insects – Ladybugs and lacewings feast on aphids and other pests.
By staying proactive, you can keep your green beans thriving without resorting to harsh chemicals. A little prevention goes a long way!
How to Harvest Green Beans for Maximum Yield
After weeks of watching your vines climb and your plants flourish, the best part of growing green beans has finally arrived—harvest time! But picking at the right moment makes all the difference between crisp, tender beans and tough, stringy disappointments.
When to Pick Green Beans for the Best Flavor
Green beans aren’t shy about telling you when they’re ready! The key is to pick early and often to keep plants producing. Here’s what to look for:
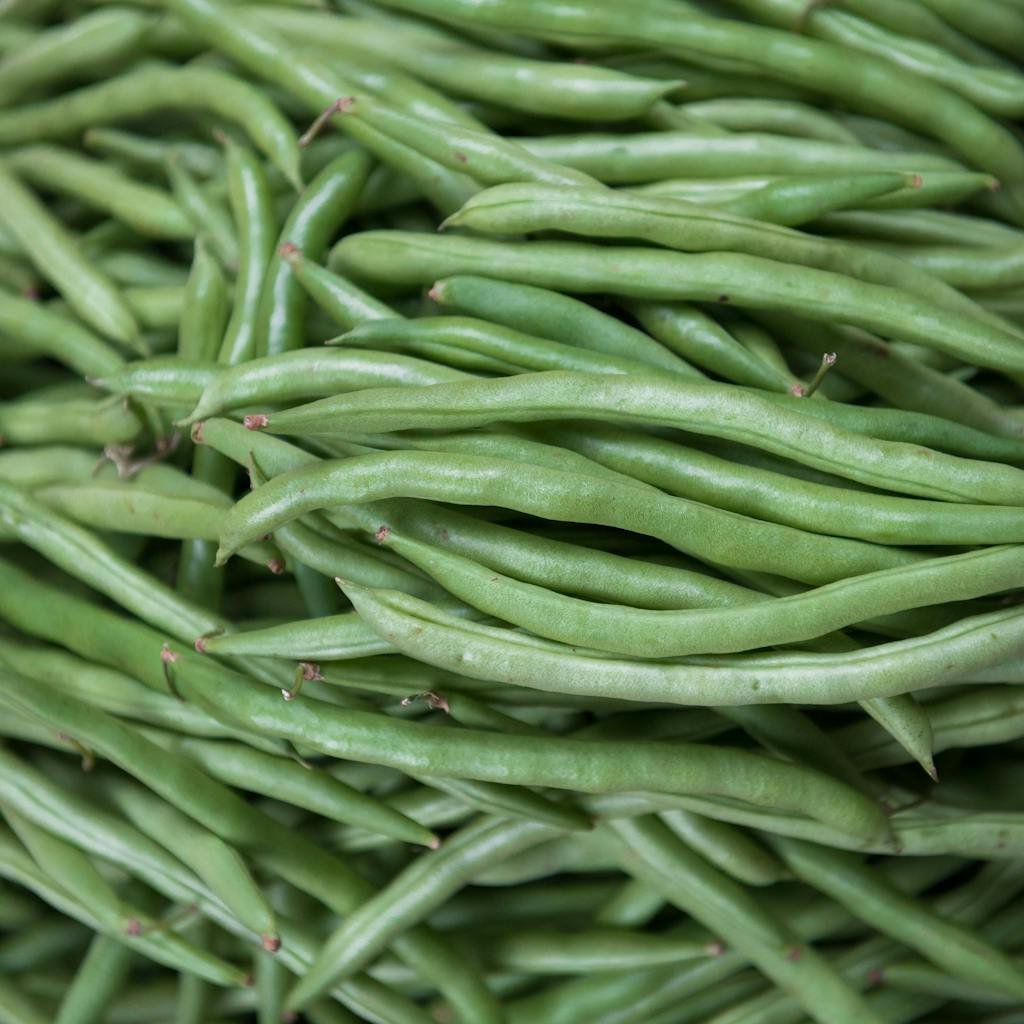
- Beans should be firm, smooth, and about the thickness of a pencil.
- Pods should be bright green and snap cleanly when bent.
- Avoid letting beans bulge with large seeds—this means they’re past their peak.
Generally, bush beans are ready in 50–60 days, while pole beans take 60–75 days to mature.
👉 Pro tip: Harvest every 2–3 days to encourage plants to keep producing!
How to Extend Your Harvest Season
A few simple tricks can keep those vines productive for weeks:
🌱 Succession planting – Plant new seeds every two weeks for a continuous supply.
✂️ Frequent picking – The more you harvest, the more the plant produces!
☀️ Keep them well-fed – A side dressing of compost or organic fertilizer keeps plants energized.
Best Methods for Storing Fresh Green Beans
Once harvested, green beans don’t last forever, but you can keep them fresh with these methods:
- Refrigeration – Store unwashed beans in a breathable bag for up to a week.
- Blanch & freeze – A quick boil-and-ice bath preserves texture and flavor for up to 6 months.
- Pickling – Turn your beans into crisp, tangy dilly beans for a longer shelf life.
With these tips, you’ll enjoy fresh green beans for as long as possible—whether straight from the vine or from the freezer in the depths of winter.
Troubleshooting Common Green Bean Problems
Even the most low-maintenance crops have their off days—and green beans are no exception. While they’re usually reliable little growers, sometimes things just don’t go to plan. Whether your plants are throwing tantrums in the form of yellowing leaves, refusing to produce, or stretching toward the sky like lanky teenagers, here’s how to gently coax them back to good health.
Why Your Green Beans Aren’t Producing
First things first: flowers but no beans? That’s often a pollination problem or heat stress. Green beans are self-pollinating, but they still need movement—wind, bees, or even a gentle shake. If it’s been hot (above 85°F/29°C), your plants might take a break from setting pods. Be patient—once temperatures drop, productivity usually bounces back. Also, too much nitrogen can lead to all leaf, no bean. Switch to a low-nitrogen, high-potassium feed.
How to Fix Yellowing Leaves or Weak Plants
Yellowing leaves can be caused by overwatering, nutrient deficiency, or poor drainage. Start by checking soil moisture—beans hate soggy feet. If your soil’s compacted or holding too much water, mix in compost or organic matter. A dose of diluted seaweed or compost tea can also perk up tired plants. Don’t forget to remove any damaged leaves so the plant can redirect energy into new growth.
Dealing with Leggy Seedlings and Stunted Growth
If your seedlings are tall and floppy, they’re likely not getting enough light. Move them to a brighter spot or gently harden them off before transplanting. For stunted plants, check for root crowding, pests nibbling underground, or a lack of nutrients. A top-up of worm castings or a compost mulch can work wonders here.
With a little observation and a few tweaks, your green beans will be back on track in no time.
Saving Green Bean Seeds for Next Year
There’s something wildly satisfying about closing the garden loop—growing your own food and saving seeds for next season. Green beans make this easy, especially if you grow open-pollinated or heirloom varieties. Not only does seed-saving save money, but it also helps your plants adapt to your specific garden conditions year after year. And honestly? There’s no better feeling than planting beans from a plant you nurtured the season before.
How to Properly Harvest and Dry Seeds
Let the pods fully mature and dry right on the vine—this is key. They should rattle when shaken and look papery and brown. Pick them on a dry day, shell the beans, and lay them out in a single layer somewhere cool, dry, and well-ventilated (a mesh screen or baking tray works great). Avoid direct sun, as it can damage the seed’s viability. Give them a week or two to fully dry before storing.
Storing Seeds for High Germination Rates
Once bone-dry, pop your seeds into paper envelopes or glass jars with a silica packet or a little dry rice to absorb any stray moisture. Label everything with the variety and date, then tuck them into a cool, dark place. A cupboard or even the fridge (in an airtight container) works beautifully. Stored well, green bean seeds can stay viable for up to 3–5 years.
Best Varieties for Seed-Saving
Stick with open-pollinated or heirloom types like ‘Blue Lake’, ‘Kentucky Wonder’, or ‘Provider’. Avoid hybrids, as they won’t come true to type. And if you’re growing multiple varieties nearby, consider staggering your planting or bagging a few flowers to prevent cross-pollination—especially with pole beans.
Seed-saving turns one harvest into many, making your garden more resilient, self-sufficient, and deeply personal.
Conclusion
And there you have it—how to grow green beans from seed to harvest, with enough tips and tricks to keep your garden humming all summer long. It’s a satisfying little crop, isn’t it? Easygoing, quick to produce, and generous to the end. But beyond the joy of growing your own dinner, there’s another reason to tuck green beans into your garden: they’re on the Dirty Dozen list. That means conventionally grown beans are often coated in pesticides, even after washing. But when you grow your own, you know exactly what’s going on your plate—fresh, chemical-free goodness straight from the soil.
Better still, green beans are fantastic team players. Because they fix nitrogen in the soil, they pair beautifully with other hungry crops from the Dirty Dozen list—think spinach, lettuce, or peppers. If you’re plotting your beds and want to double up on productivity (and reduce your weekly food bill while you’re at it), green beans are the backbone of a clever companion planting plan.
Need more ideas? I’ve put together a full guide on how to grow the Dirty Dozen in your own garden, so you can tackle the whole list one raised bed at a time. Because growing your own isn’t just about saving money or avoiding chemicals—it’s about reclaiming a little bit of food sovereignty, one green bean at a time.
So go on, grab a packet of seeds, and start your next harvest story. The soil’s waiting.

