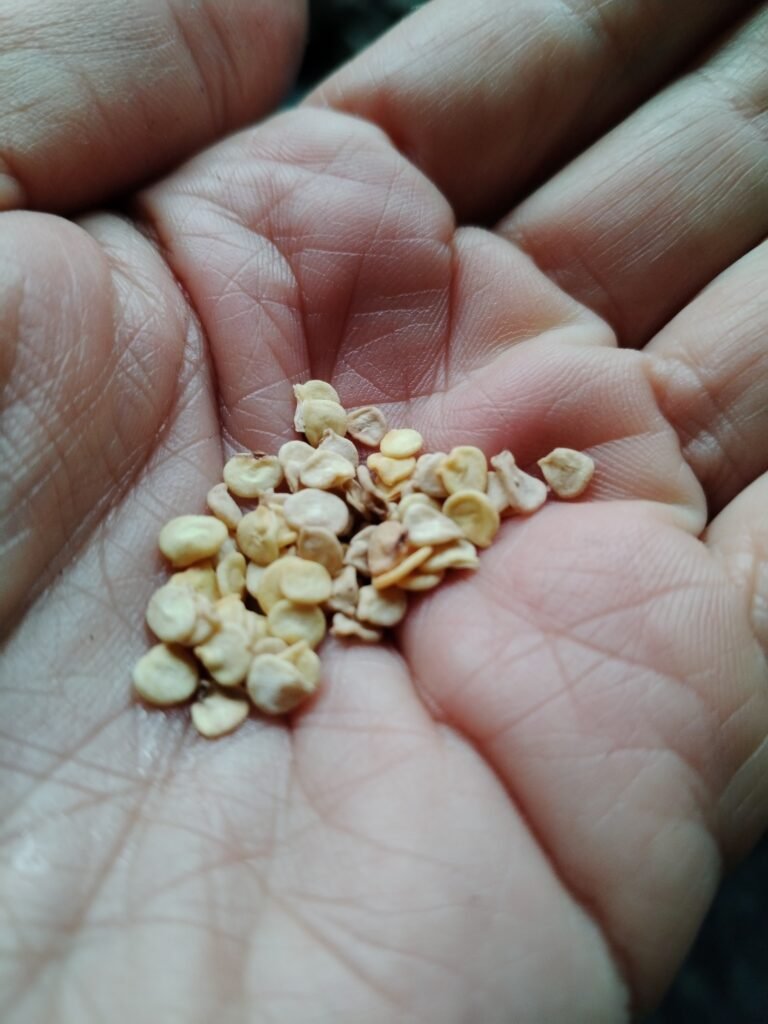
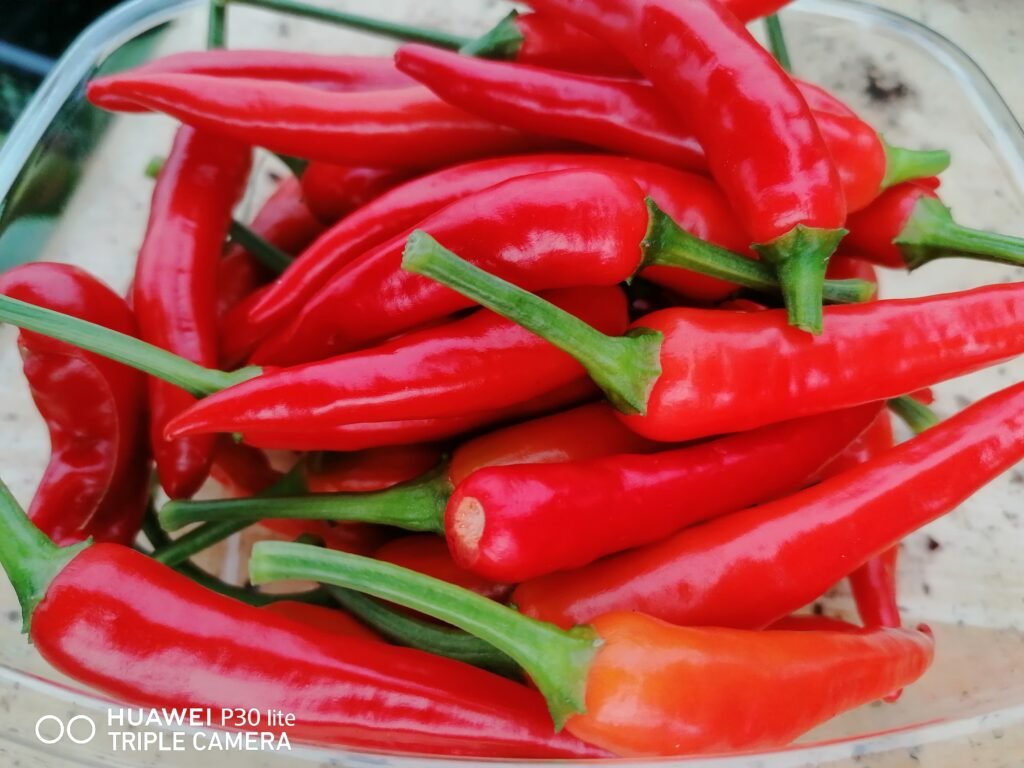
There’s something undeniably thrilling about growing chili peppers. It starts with a tiny seed—unassuming, full of potential—and before you know it, you’re on a mission to grow chili peppers in every shape, color, and heat level imaginable. Some ripen into deep, dramatic reds; others glow golden like little lanterns. Some lull you into a false sense of security with their mild sweetness, while others could send a seasoned spice lover scrambling for a glass of milk.
The real joy of growing chili peppers isn’t just the harvest—it’s the adventure. With over 4,000 varieties to choose from, there’s a chili for every personality. Maybe you’re drawn to the smoky complexity of Ancho peppers, the citrusy zing of Aji Limón, or the wild, untamed heat of the Carolina Reaper. Want something for homemade hot sauce? Ferment some Cayenne. Need a mild, snacking pepper? Try Aji Delight, where every tenth one packs a surprise kick.
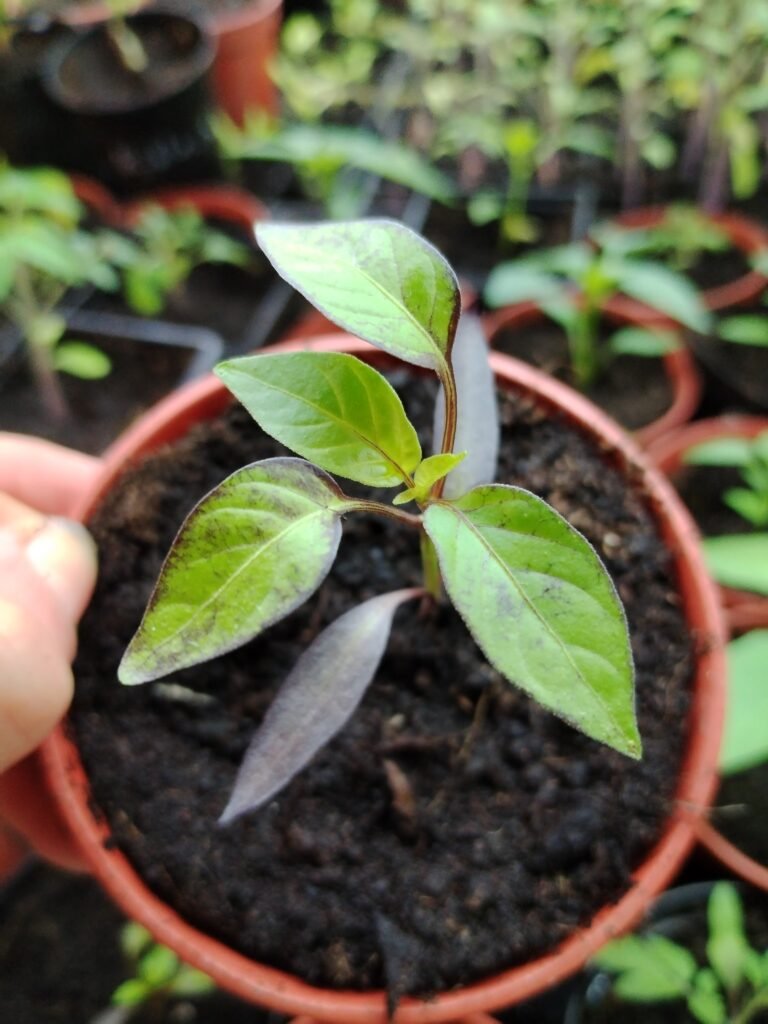
But the real magic? Watching them grow. From the first delicate sprout pushing through the soil to the moment those little green pods start to ripen into vibrant hues, chili peppers have a way of making gardening feel a bit like alchemy. And because they thrive in pots just as well as garden beds, even a sunny windowsill can become a mini spice farm.
Whether you’re after blistering heat or just a splash of color, growing chili peppers is as rewarding as it is exciting. Ready to dive in? Let’s walk through exactly how to grow chili peppers from seed to harvest—because the best flavors are the ones you grow yourself.
Some of the links in this post are affiliate links, including links to products on Amazon. This means if you click and make a purchase, I may earn a small commission at no extra cost to you. I only recommend items I genuinely love and believe could add value to your life. Thank you for supporting this blog—it helps keep the content free and full of ideas just for you!
The Scoville Scale – Measuring Chili Heat
Ever wondered why some chilies make you break into a sweat while others just add a gentle warmth? That’s where the Scoville Scale comes in—a heat-ranking system that dates back to 1912 when pharmacist Wilbur Scoville decided to put science behind the spice.
Originally, the scale measured heat through a taste test (yes, real people volunteered for this job!). Capsaicin—the compound responsible for the burn—was extracted from chilies and diluted with sugar water. The more dilution needed to neutralize the heat, the higher the chili ranked on the scale. For example, if a chili needed 10,000 parts of sugar water to stop the burn, it was rated 10,000 Scoville Heat Units (SHU).
These days, we’ve swapped out human guinea pigs for high-performance liquid chromatography (HPLC), a lab method that measures capsaicin concentration with scientific precision. But the Scoville Scale remains the gold standard for chili lovers worldwide, helping us gauge whether we’re biting into a pleasant warmth or an inferno.
Choosing the Right Chili Pepper Seeds
Ah, the excitement of picking chili seeds—it’s like curating your own little spice cabinet before the plants have even sprouted! With hundreds of varieties ranging from delightfully mild to downright diabolical, choosing the perfect chili is half the fun. Do you want a sweet, smoky kick? Or are you the kind of person who hears “world’s hottest” and takes it as a personal challenge? Let’s dive in.
Popular Varieties – From Playful Heat to Fire-Breathing Fury
- Jalapeño – The trusty sidekick of the chili world. Medium heat (2,500-8,000 SHU), great for salsa, poppers, and sneaking into everything.
- Habanero – Fruity, floral, and fiery (100,000-350,000 SHU). Like a spicy sunset in a bite.
- Cayenne – That bright red dash of fire in your spice rack (30,000-50,000 SHU).
- Ghost Pepper – The name says it all. Once the world’s hottest (up to 1,500,000 SHU), it’s not for the faint of heart.
- Carolina Reaper – The reigning king of heat (1,641,183 SHU). Grown for bragging rights as much as flavor.
The Scoville Scale – Understanding Chili Heat
Think of the Scoville Scale as a spice intensity meter, measuring capsaicin (the stuff that makes chilies burn so good). A quick breakdown:
- Mild (0-2,500 SHU) – Bell Peppers, Banana Peppers
- Medium (2,500-30,000 SHU) – Jalapeño, Serrano
- Hot (30,000-100,000 SHU) – Cayenne, Thai Chilies
- Very Hot (100,000-350,000 SHU) – Habanero, Scotch Bonnet
- Super Hot (350,000+ SHU) – Ghost Pepper, Carolina Reaper (a.k.a. chili madness)
Best Chili Peppers for Different Climates
Chili peppers might be fiery, but they can be surprisingly picky about where they grow best. Here’s what works in different climates:
- Cooler Climates – ‘King of the North’ or ‘Aji Guyana’ ripen faster in short summers.
- Warmer Climates – Habanero, Ghost Pepper, and Carolina Reaper love heat. The spicier the chili, the more sunshine it craves!
- Humid Climates – Habaneros and other Capsicum chinense peppers handle humidity like pros.
If you’re still debating which chili is your perfect match, check out this video:
How to Start Chili Pepper Seeds Indoors
Growing chili peppers from seed is a bit like raising tiny green dragons—you nurture them from delicate little seedlings into fiery, fruit-bearing powerhouses. And just like dragons, chilies thrive with a warm, cozy start. That’s why starting your seeds indoors gives them the best chance to grow into strong, healthy plants.
🏡 Why Start Chili Seeds Indoors?
Chili peppers need warmth, time, and a little TLC to sprout. If you wait until outdoor temperatures are just right, you might lose valuable growing time—especially in cooler climates. By starting seeds indoors, you:
- Extend the growing season, giving your plants a head start.
- Control the environment, ensuring they get the warmth and humidity they crave.
- Encourage stronger roots, leading to healthier, more productive plants once they’re transplanted.
🌡️ The Perfect Conditions for Germination
Chili seeds are a little picky when it comes to germination. They need:
- Consistent warmth—between 75-85°F (24-29°C) for most varieties. Super-hot peppers like Carolina Reapers? They love it closer to 90°F (32°C)!
- High humidity—using a humidity dome or plastic wrap helps lock in moisture.
- Plenty of light—once sprouted, seedlings need 12-16 hours of light per day to prevent legginess.
If you want thriving chili plants, think warm, moist, and bright!
🛠️ Must-Have Equipment for Success
Before you start, gather your gear:
- Seed trays or small pots—well-draining ones are best.
- Heat mat—keeps soil warm for faster germination.
- Grow lights—full-spectrum LED or fluorescent lights work best.
- Spray bottle—for gentle watering without disturbing seeds.
- Humidity dome—helps keep moisture levels stable.
💦 How to Soak and Plant Chili Seeds
Some chili seeds—especially super-hot varieties—can be slow to sprout due to their tough outer coating. To speed things up:
- Soak seeds in warm water or chamomile tea for 12-24 hours to soften the seed coat.
- Fill seed trays with moist, well-draining seed-starting mix (not regular potting soil).
- Plant seeds ¼ inch deep, covering them lightly with soil.
- Mist with water and cover with a humidity dome or plastic wrap.
- Place the trays on a heat mat and keep the soil consistently warm.
Patience is key—some chili seeds pop up in 5 days, while others (especially the hottest ones) can take up to 4 weeks!
⏳ How Long Until Chili Seeds Sprout?
It depends on the variety, but here’s a general breakdown:
- Mild peppers (e.g., Jalapeño, Banana Peppers) – 5-10 days
- Medium-hot peppers (e.g., Cayenne, Serrano) – 7-14 days
- Super-hot peppers (e.g., Habanero, Ghost Pepper, Carolina Reaper) – 14-30 days
If your seeds are slow to sprout, don’t panic! Just keep them warm and moist, and they’ll emerge when they’re ready.


Troubleshooting Chili Pepper Seed Germination Issues
Growing chili peppers from seed is an adventure, but sometimes those little seeds seem stubbornly determined to stay dormant. Why aren’t they sprouting? Why does your seed tray suddenly smell a bit… funky? Don’t worry—you’re not alone! Let’s tackle the most common chili seed germination problems and how to fix them.
Common Germination Problems (and How to Fix Them!)
🌱 Seeds Not Sprouting
- Possible cause: Too cold! Chili seeds need warm soil (75–85°F/24–29°C).
- Fix: Use a heat mat to keep the soil cozy. Super-hot varieties may need 90°F (32°C)!
- Possible cause: Old or poor-quality seeds.
- Fix: Always buy from reputable seed suppliers and check expiration dates.
- Possible cause: Soil is too wet or too dry.
- Fix: Keep soil evenly moist but not soggy—use a spray bottle to mist.
🍄 Moldy Soil
- Possible cause: Too much moisture, not enough airflow.
- Fix: Let the surface dry slightly between waterings, improve ventilation, and sprinkle a little cinnamon (a natural antifungal!).
🌱 Weak or Leggy Seedlings
- Possible cause: Not enough light!
- Fix: Move seedlings under grow lights for 12–16 hours per day.
How to Fix Slow or Failed Germination
If your chili seeds still aren’t sprouting, try these tricks:
- Pre-soak seeds in warm water or chamomile tea for 12–24 hours before planting.
- Use the plastic bag method—place seeds in a damp paper towel inside a sealed bag and keep it somewhere warm.
- Be patient! Super-hot varieties can take up to 30 days to germinate.
Pro Tip: The Paper Towel Method for Stubborn Seeds
For the most stubborn chili seeds, try this failproof germination hack:
- Dampen a paper towel (not soaking wet).
- Place chili seeds on one half, then fold the towel over them.
- eal in a ziplock bag and store in a warm place (like the top of your fridge).
- Check daily for sprouts—once they pop, transfer them to soil carefully!
This method works especially well for super-hot chili varieties that take ages to germinate.
Need a visual guide? Check out this YouTube tutorial on fixing stubborn chili seed germination problems:
Transplanting Chili Pepper Seedlings
Your tiny chili seedlings have finally pushed through the soil, stretched toward the light, and started growing their first true leaves. Now comes the exciting (and slightly nerve-wracking) part—transplanting! Whether you’re moving them to bigger pots or straight into the garden, doing it right will set them up for a season of fiery success.
🌱 When & How to Move Seedlings into Pots or the Garden
Chili seedlings are ready for transplanting when:
- They have at least two sets of true leaves (not just the first baby leaves).
- Their roots fill the container but aren’t root-bound.
- Outdoor temperatures stay above 55°F (13°C) at night—chilis hate the cold!
How to transplant:
- Water seedlings a few hours before moving to reduce stress.
- Gently loosen the roots from their container. Be careful not to break them!
- Plant at the same depth as before (chili peppers don’t like to be buried deeper).
- Press soil lightly around the roots and water thoroughly.
If moving outdoors, harden off seedlings first! This means gradually introducing them to outdoor conditions over 7–10 days, starting with an hour of sunlight and increasing daily.
🏡 Best Soil Mix for Chili Peppers
Chilis thrive in light, well-draining soil. If growing in pots, use a mix of:
- 60% potting soil (organic is best!)
- 20% perlite (for drainage)
- 20% compost or worm castings (for nutrients)
For garden soil, mix in aged compost and sand to improve aeration and nutrition. Avoid heavy clay soil—it holds too much water and can lead to root rot.
🌞 Sunlight & Watering Needs for Young Plants
Chili peppers love the sun! They need:
- At least 6–8 hours of direct sunlight per day.
- Consistent moisture—but don’t drown them! Let the top inch of soil dry out between watering.
- A good soak, not a sprinkle—water deeply to encourage strong root growth.
If growing in pots, make sure they have drainage holes to prevent soggy roots.
How to Avoid Transplant Shock
Transplant shock can slow growth—or worse, kill your seedlings. To prevent it:
- Water deeply right after transplanting.
- Keep them shaded for a day or two if it’s very hot.
- Use diluted seaweed extract or a gentle fertilizer to help with stress recovery.
- Don’t rush them into direct sunlight—ease them in gradually.
With a little TLC, your chili plants will settle into their new homes and start growing like wildfire. Up next? How to keep them thriving through the season!
Growing Chili Peppers Outdoors vs. Indoors
If you’re in the west of Ireland, the idea of growing chili peppers outdoors is about as realistic as sunbathing in December. Sure, you could try—but between the relentless rain and the ever-persistent wind, your poor chili plants might pack their bags and migrate south. Thankfully, chili peppers are quite happy indoors, and with the right setup, you can grow them anywhere—from a sunny windowsill to a cozy greenhouse.
Indoor Chili Growing Tips: Pots, Grow Lights & Space-Saving Techniques
Indoor chili growing has its perks: no surprise frosts, no garden pests, and no chance of your plants getting battered by a rogue storm. Here’s how to set up a chili-friendly indoor space:
- Pots matter: Choose 10–12 inch pots with drainage holes—chilis like space but hate wet feet.
- Sunlight vs. grow lights: If you have a south-facing window, great! If not, a full-spectrum grow light (12–14 hours a day) will keep your plants happy.
- Air circulation: Stagnant air leads to weak stems and mold issues. A small fan can mimic outdoor breezes and strengthen plants.
- Pruning for space: If you’re short on room, regular pruning and topping keeps chili plants bushy and compact without sacrificing yield.
Outdoor Growing: Sunlight Requirements, Spacing & Companion Planting
If you’re lucky enough to live somewhere warm (or have a greenhouse to cheat the Irish weather), growing chilis outside can be hugely rewarding. They love:
- A warm, sheltered spot with at least 6–8 hours of direct sunlight daily.
- Good spacing—at least 12 inches apart for airflow and healthy roots.
- The right companions—chilis grow well with basil (pest deterrent), marigolds (aphid repellent), and onions (soil health booster).
Avoid planting them near fennel or brassicas—they compete for nutrients and can stunt chili growth.
🛡️ Protecting Plants from Pests & Diseases
Chili peppers can attract aphids, spider mites, and whiteflies, especially in greenhouses or warm indoor spaces. To keep them at bay:
- Introduce natural predators like ladybugs.
- Spray with neem oil or insecticidal soap if infestations start.
- Improve airflow—fungal issues love damp, stagnant conditions.
Whether you grow them indoors or risk the Irish elements, chili plants will reward you with fiery fruits and endless culinary adventures. Just remember—indoors, they’ll thank you for the extra warmth; outdoors, well… good luck!
Caring for Chili Pepper Plants for Maximum Yield
Chili peppers are like rebellious teenagers—give them too much love (or water), and they sulk. Give them just the right balance of care, and they’ll reward you with a fiery harvest. If you want plenty of plump, spicy pods, mastering watering, feeding, and pruning is key.
💦 Proper Watering Techniques: Avoiding Overwatering & Root Rot
Chili plants enjoy a good drink but absolutely hate wet feet. Their roots need oxygen, and soggy soil leads to suffocation (aka root rot). Keep them happy by:
- Watering deeply but letting the top inch of soil dry out between drinks.
- Watering in the morning to avoid fungal issues overnight.
- Using well-draining soil and pots with drainage holes (if growing in containers).
- Avoiding wet leaves—water at the base to prevent fungal diseases.
A simple trick? If the leaves start to droop, give them a drink. If they look dark green and limp, you’ve overdone it.
🥗 Best Organic Fertilizers for Chili Peppers
Chili plants are hungry, especially when fruiting. A little organic fertilizer goes a long way in boosting heat and flavor. Some top choices:
- Compost tea or worm castings for healthy, slow-release nutrients.
- Bone meal for root strength and potash (wood ash) for better fruit production.
- Diluted seaweed or fish emulsion—a great fortnightly feed during flowering.
Too much nitrogen leads to big leafy plants with no fruit—so don’t overdo it on high-nitrogen feeds.
✂️ Pruning and Pinching for Bushier Plants
Want a compact, high-yielding plant instead of a lanky one? Prune and pinch!
- Pinch off the top growth when seedlings have 4-6 true leaves to encourage branching.
- Remove weak or crossing branches to let air and light reach all parts of the plant.
- Snip early flowers on young plants to promote stronger roots and stems before fruiting.
It might feel wrong to remove flowers, but trust me—your future self will thank you when the plants are loaded with chilies later on.
🏡 Staking and Supporting Heavy Fruiting Varieties
Some chili varieties (like habaneros and Thai chilis) stay compact, but others, like jalapeños and ghost peppers, can get top-heavy. Avoid broken stems by:
- Using bamboo stakes or tomato cages to support taller varieties.
- Tying up heavy branches with soft twine or Velcro plant ties.
- Spacing plants properly so they don’t crowd each other out.
With the right care, your chili plants will thrive and produce loads of fiery fruit—just be ready for an overflowing spice rack (and possibly some regret when you bite into a fresh Carolina Reaper).
Harvesting and Storing Chili Peppers
The moment of truth has arrived! Your chili plants have been lovingly tended, whispered to (probably), and now they’re dripping with fiery jewels. But when do you pick them? How do you store them for long-term spice adventures? Let’s dive in.
How to Know When Chili Peppers Are Ready to Pick
Chilies are like fine wine—their flavor and heat develop over time. Here’s how to tell when they’re at their peak:
- Color Change: Most varieties start green and ripen to red, yellow, orange, or even purple. Check what’s normal for your variety!
- Glossy, Firm Skin: If the chili looks plump and smooth, it’s ready. If it’s shriveled, it’s past its prime.
- Scoville Surprise: The longer a chili stays on the plant, the hotter it gets—so pick early for milder heat or wait for full spice power.
For continuous production, harvest regularly to encourage more fruiting.
The Right Way to Harvest Without Damaging Plants
Chili plants may be tough, but their stems are delicate and easy to snap if you’re too rough. Instead of yanking the fruit off:
- Use sharp scissors or pruning shears to cut the stem just above the pepper.
- Avoid pulling—twisting can damage branches and reduce future harvests.
- Harvest in the morning when the plants are hydrated and less stressed.
If you get impatient and pick a chili that’s not fully ripe, don’t worry—they’ll continue ripening indoors if left on a windowsill.
Storage Methods: Drying, Freezing, and Fermenting Chilies for Long-Term Use
Once you’ve harvested more chilies than you know what to do with (trust me, it happens), it’s time to preserve the spice:
- Drying: Hang whole chilies in a warm, dry place or use a dehydrator. Once crispy, grind them into homemade chili flakes or powder.
- Freezing: Chop fresh chilies and freeze them in airtight bags—perfect for tossing into soups and stews later.
- Fermenting: Make your own homemade hot sauce by fermenting chilies with salt and water for a few weeks. The flavor deepens, and it’s probiotic-rich!
With these methods, your chili harvest will last all year, giving you a steady supply of homegrown heat. Just don’t forget to label your storage containers—accidentally mistaking ghost pepper flakes for paprika could be a spicy disaster.
Wrapping Up: Your Spicy Journey Begins
Growing chili peppers is more than just a gardening project—it’s an adventure in heat, flavor, and endless variety. Whether you’re harvesting mild, smoky Poblanos or Carolina Reapers that could melt your face off, there’s a chili for everyone. And the best part? With the right care, your plants will reward you with months of fiery goodness, ready to spice up your kitchen.
If you’re hungry for more (and let’s be honest, chili-growing is addictive), here are a few must-read books to take your pepper game to the next level:
📖 The Hot Pepper Cookbook by Heather Thomas – Packed with bold recipes, from fiery salsas to smoky stews. Because what’s the point of growing chilies if you’re not going to cook with them?
📖 RHS Red Hot Chilli Grower by Kay Maguire: The complete guide to planting, picking and preserving chillies – A deep dive into different varieties, growing techniques, and preserving methods, written by two absolute chili legends.
📖 Fermented Hot Sauce Cookbook by Rockridge Press – If you’re curious about making your own probiotic-rich hot sauces, this book is a goldmine.
And of course, experiment, taste, and have fun! No two chili seasons are the same, and whether you’re drying, fermenting, or tossing them fresh into a dish, homegrown chilies always taste better.
So tell me—what’s the hottest pepper you’ve ever dared to eat?


