How to grow potatoes in containers is easier than you might think—even if you don’t have a big garden. In fact, all you need is a bucket, some soil, and a sunny spot to get started. Growing your own spuds can be as simple as placing a pot by the back door and giving it a bit of love.
We first tried container potatoes one rainy spring when our garden beds were too soggy to plant. Gar found an old barrel, I grabbed a few seed potatoes from the kitchen, and we decided to give it a go. A few months later, we tipped the barrel over and couldn’t believe it—a whole armful of golden spuds tumbled out like buried treasure!
Since then, we’ve grown potatoes in all sorts of containers: feed sacks, cracked laundry baskets, and wooden crates. It’s a bit of magic every time. The plants don’t ask for much—just some compost-rich soil, regular water, and a sprinkle of sunshine.
Better yet, container growing keeps things tidy and simple. No need for heavy digging or big tools. Plus, it’s perfect for small spaces like balconies, patios, or even sunny windowsills.
If you’ve ever dreamed of growing your own food, this guide is the perfect place to start. We’ll walk you through every step—from picking the right potato variety to harvesting your crop with a smile. So grab a pot and let’s dig in!
Why Grow Potatoes in Containers?
So, why grow potatoes in containers? Well, for starters, it saves space! If you don’t have a garden, no worries—you can still grow a bunch of tasty spuds right on a balcony, porch, or even a sunny step. That’s what makes this method perfect for small homes or city living.
Even better, growing in containers helps keep pests and diseases away. Since your potatoes are up off the ground, it’s much easier to spot problems early and keep everything neat and tidy. We’ve found that fewer bugs mean happier plants—and happier gardeners too.
Plus, you won’t have to do nearly as much weeding or digging. That’s a big win, especially if you don’t love bending over in the garden for hours. With container potatoes, you just water, wait, and enjoy the show.
This growing method is also great for kids and beginners. It’s fun to watch the leaves grow tall and the flowers bloom. And when it’s harvest time, lifting the potatoes out of the soil feels just like a treasure hunt. There’s nothing quite like the joy on a child’s face when they pull out their first potato!
Finally, cleanup is a breeze. No mud, no mess, and no need for a spade. Just tip over the pot and gather your harvest. Simple as that!
Choosing the Right Container for Potatoes
You don’t need anything fancy to grow potatoes in containers—but picking the right one can make a big difference. Let’s go over your options!
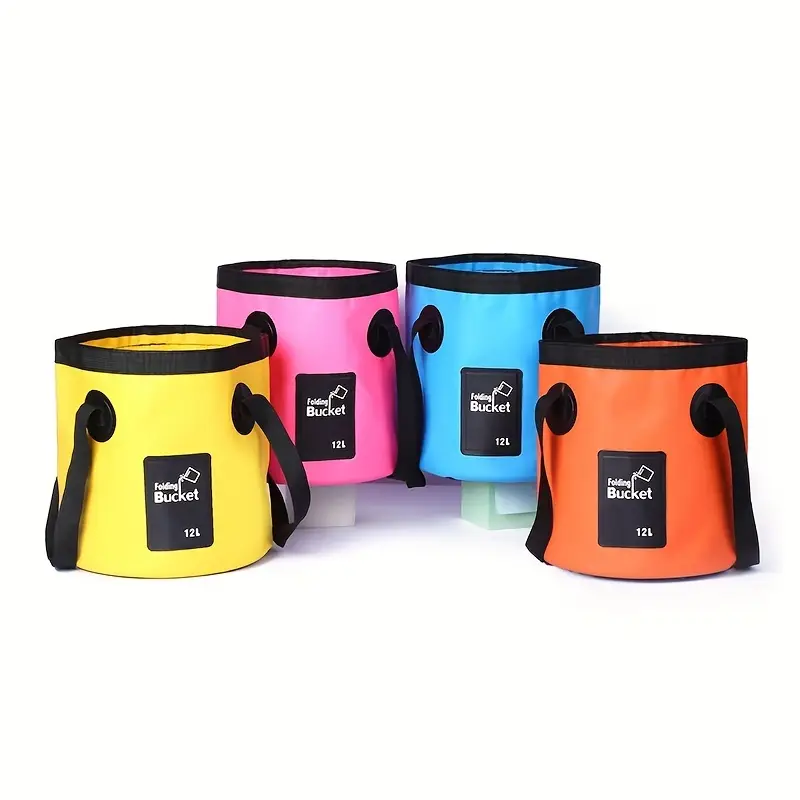
Buckets (10–15L)
Buckets are one of the easiest and cheapest choices. Many gardeners reuse old paint or feed buckets—just make sure to drill holes in the bottom so the water can drain. They’re sturdy, tall enough for root growth, and easy to move around.
💡 Tip: Add an affordable bucket set with pre-drilled holes to your garden gear and you’re good to go!
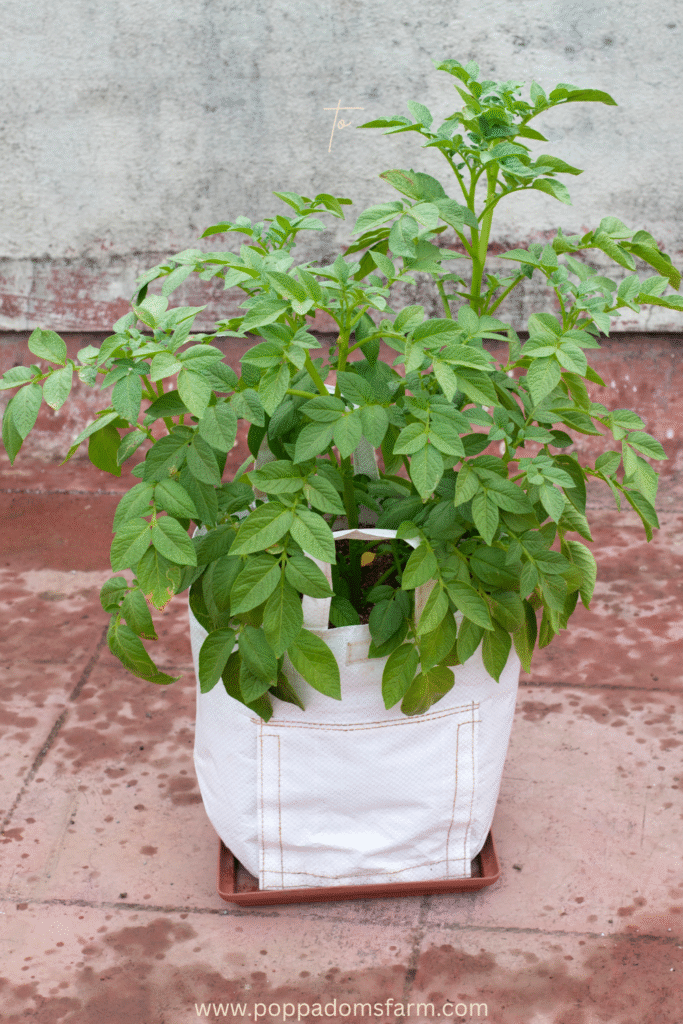
Grow Bags
These fabric bags are made just for growing things. They let air reach the roots and help keep the soil from getting soggy. Grow bags also fold flat when not in use—perfect if you’re short on storage space.
🌿 Our top pick: These breathable potato grow bags with side flaps make harvesting super easy!

Large Pots or Tubs
If you have old flower pots or big tubs lying around, they’ll work too! Just check they’re at least 30cm (12 inches) deep and have drainage holes. Terracotta pots look nice, but plastic ones hold water better and are lighter to lift.
🌞 We love this lightweight plastic planter with a self-watering base—no more droopy spuds!
DIY vs. Store-Bought Potato Containers
Here’s a quick look at the pros and cons of both options:
| Feature | DIY Containers | Store-Bought Containers |
|---|---|---|
| Cost | Usually free or low-cost | Varies, often €10–€25 per container |
| Customizable | Yes—cut, drill, or paint as needed | Limited shapes and sizes |
| Drainage | You’ll need to add holes yourself | Designed with drainage built-in |
| Durability | Depends on materials used | Often made with weather-resistant fabric or plastic |
| Ease of Use | May need tools to prep | Ready to go out of the box |
| Storage | Can take up more space | Some fold flat for easy storage |
Both choices can work beautifully—it really depends on your space, budget, and how hands-on you like to be. If you’re crafty, try the DIY route! But if you want something quick and easy, store-bought options are a time-saver.
Fun and Frugal DIY Potato Containers
You might be surprised at what you can grow potatoes in. If it’s deep enough, drains well, and holds soil, it might just work! Here are some clever ideas:
Washing Baskets
Old laundry baskets are great for potatoes. The holes on the sides give airflow and let extra water out. Just line them with hessian or an old pillowcase so the soil stays put.
Hay Bales
Yes, really! Stack two bales side by side, hollow out a bit in the middle, and fill with compost. The straw keeps things warm, and you can compost it when the season ends. It’s low-waste gardening at its finest.
Tires (Stacked)
Old car tires can be stacked to make a deep container. Start with one tire, plant your spuds, then add another tire and more compost as the plants grow. Just be sure they’re clean and in good condition.
Woven Baskets
Those wicker baskets gathering dust in your shed? Line them and use them as charming potato pots! They’re breathable and perfect for a rustic garden look.
Old Compost Bags
Flip them inside out (to avoid branding), punch a few drainage holes in the bottom, and roll the top down. Voila! A free, no-fuss grow bag.
Plastic Storage Tubs
Cracked or extra tubs from the garage can be drilled for drainage and repurposed for potato planting. Sturdy and spacious!
Preparing the Perfect Soil Mix
Growing potatoes in containers starts with one very important thing—good soil. Let’s break it down step by step so your spuds can grow big, happy, and healthy.
Loose, Well-Draining Soil Is Key
Potatoes need soil that’s soft, fluffy, and drains well. If it’s too hard or soggy, your potatoes won’t have room to grow and might even rot. Think of it like a cozy bed that still lets air and water move through.
Recommended Mix: Compost + Coconut Coir + Perlite or Sand
A great recipe for container soil is one part compost, one part coconut coir, and one part perlite or sand. Compost adds nutrients, coconut coir holds moisture, and perlite or sand keeps things light and airy. It’s like a balanced breakfast—but for plants!
pH Level for Optimal Growth
Potatoes prefer slightly acidic soil. A pH level between 5.0 and 6.0 is perfect. You can use a simple soil pH test kit (link this!) to check your mix before planting. It’s a small step, but it can make a big difference.
Organic Matter and Slow-Release Fertilizer Tips
Potatoes are hungry little plants! To grow strong and make big, tasty tubers, they need three main things in the soil: nitrogen for leafy growth, phosphorus for root development, and potassium for healthy, firm potatoes. A little bit of each goes a long way.
Start by mixing in some organic matter like worm castings or well-aged manure. These help feed your soil and boost microbial life. Then, add a slow-release vegetable fertilizer that gives your potatoes the nutrients they need over time.
Two great options for beginners are:
- 🌱 Jobe’s Organics Vegetable & Tomato Fertilizer Spikes – Easy to use and made from organic materials. Just push them into the soil and you’re done!
- 🌿 Dr. Earth Organic 5 Tomato, Vegetable & Herb Fertilizer – A slow-release blend with probiotics and lots of potassium, perfect for container-grown crops like potatoes.
These will help your potato plants stay happy all season long without you needing to feed them every week. Just one sprinkle (or spike!) and you’re good to grow.
Picking the Best Potato Varieties for Containers
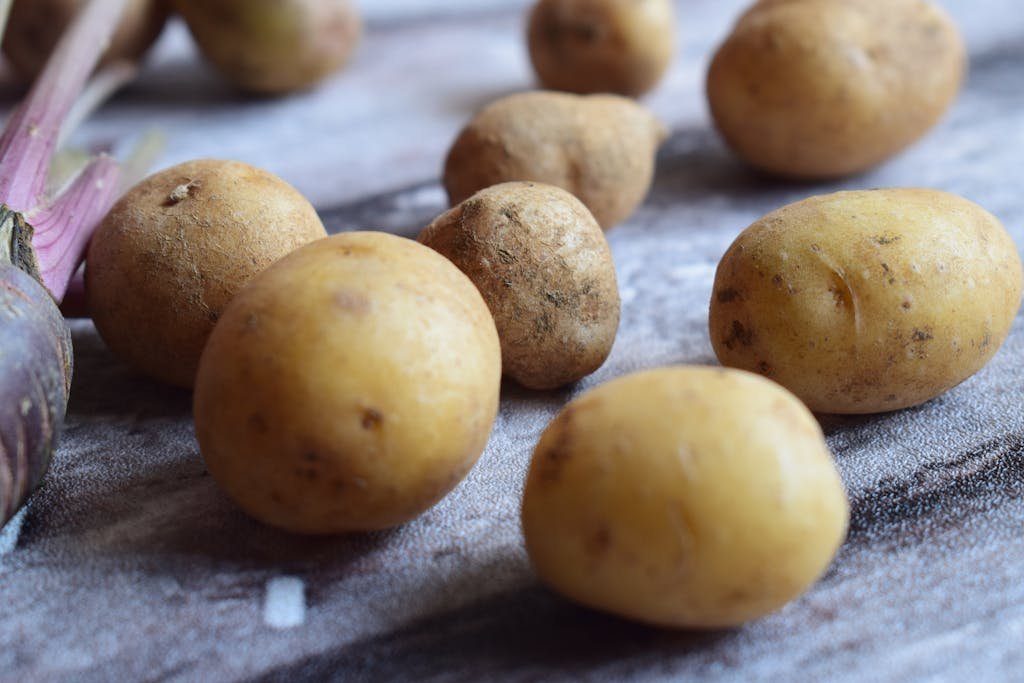
When you’re growing potatoes in containers, picking the right variety makes a big difference. Some types grow quicker, stay smaller, and do much better in pots or buckets. Early potatoes are a great choice if you want fast results and a gentle intro to potato growing. Varieties like ‘Charlotte’, a lovely salad potato with a creamy bite, ‘Rocket’, which is ready in just 10 weeks, and ‘Swift’, known for its speedy growth and smooth skin, are all brilliant for beginners. They’re compact, reliable, and happy even in a small space.
If you’re after a bigger harvest and you’re okay with waiting a bit longer, then maincrop potatoes are for you. These varieties take more time, but the reward is a larger yield and better storage. ‘Maris Piper’ is a classic—perfect for fluffy mash and roasties. ‘Desiree’ is tough in dry weather and gives you creamy, red-skinned spuds. And then there’s ‘King Edward’, an old-time favourite that bakes beautifully. Just remember, maincrops need a bigger container and a little more patience.
Whether you’re growing early or maincrop potatoes, always choose certified seed potatoes from a trusted supplier. This helps avoid diseases and ensures good sprouting. It’s best to skip store-bought spuds, since they’re often treated with sprout inhibitors that can mess with your growing success.
When and How to Plant Potatoes in Containers
Timing by Climate Zone (Early Spring or After Last Frost)
To start your potatoes off right, wait until the last frost has passed. In most places, that means early spring. If you live somewhere warmer, you might be able to start even earlier. Just make sure the soil isn’t too cold—potatoes like it cozy!
Chitting: What It Is and Why It Helps
Chitting might sound strange, but it’s easy and helpful. Just place your seed potatoes in a cool, bright place (like a windowsill) for a couple of weeks. They’ll grow little sprouts. This gives your plants a head start and helps them grow strong and fast once they’re in the soil.
How Deep to Plant: 4–6 Inches Initially
When planting, dig down about 4 to 6 inches and pop your seed potatoes in with the sprouts pointing up. Cover them with soil and give them a good drink of water. Soon, green shoots will appear!
How to “Hill” Potatoes as They Grow
As your potato plants grow taller, they’ll need more soil added to keep the tubers safe. This is called “hilling.” When the plant gets about 6 inches tall, gently add more soil around the stem—just enough to cover the bottom half of the plant. Do this every couple of weeks to help grow more potatoes and keep them from turning green in the sunlight.
Care and Maintenance Throughout the Season
Keeping your potato plants happy isn’t hard, but they do need a little attention each week. Let’s break it down step by step so your container potatoes can thrive all season long.
Sunlight Requirements (6–8 Hours per Day)
Potatoes love the sun! Make sure your containers are in a spot that gets at least 6 to 8 hours of sunlight each day. A sunny balcony, patio, or garden corner is perfect. If your plants start to look leggy or pale, they might need more light.
Watering Schedule and Moisture Control
Consistent watering is key. Try to keep the soil evenly moist but not soggy. Stick your finger in the soil—if the top inch feels dry, it’s time to water. On hot summer days, you might need to water more often. Just don’t let the roots sit in standing water, or they could rot.
Fertilizing Tips for Strong Tuber Production
Potatoes need plenty of nutrients to grow big, tasty tubers. A slow-release organic fertilizer every few weeks can work wonders. Look for one that’s lower in nitrogen but rich in phosphorus and potassium. These two nutrients help build strong roots and plump up those potatoes!
How to Support Healthy Foliage
Healthy leaves mean strong plants. Keep your foliage happy by avoiding overhead watering (which can cause mildew). If any leaves turn yellow or spotty, gently remove them. Good airflow around the plant also helps keep disease away and encourages lush, green growth.
Common Pests and Problems in Container-Grown Potatoes
Even though growing potatoes in containers can help avoid many issues, a few pesky problems can still pop up. Don’t worry—we’ll go through them one by one so you’ll know what to look for and how to handle them the natural way.
Potato Beetles, Aphids, and Root Rot
These are the main troublemakers. Colorado potato beetles are small striped bugs that love to munch on leaves. Aphids are tiny green or black insects that suck the sap out of plants. Root rot happens when the soil stays too wet and the roots start to decay. To help prevent all three, check your plants regularly, keep the soil well-drained, and remove any bugs you spot by hand.
Signs of Stress or Disease
Look out for yellowing leaves, black spots, or wilting. These can be signs your plant isn’t happy. It could be overwatering, poor drainage, or even a disease. A quick fix is to check your container’s drainage holes and make sure the soil isn’t soggy.
Natural Pest Control (Neem Oil, Companion Planting)
Neem oil spray is a great organic option to fight off pests. It’s safe for your plants and the environment. You can also try companion planting—growing things like basil, nasturtiums, or marigolds near your potatoes. These friendly plants help keep bad bugs away.
Preventing Green Potatoes (Exposure to Sunlight)
Green potatoes happen when the tubers peek out of the soil and get too much sunlight. This can make them taste bitter and even be unsafe to eat. To avoid this, always keep your growing potatoes covered with soil or straw. Keep “hilling up” as they grow to block the light.
How and When to Harvest Your Potatoes
After weeks of care and watching those leafy green tops grow taller, it’s finally time for the fun part—harvest! But how do you know when your spuds are ready? Let’s break it down step by step.
When to Harvest: Flowering Stage vs. Foliage Dieback
There are two signs to watch for. If your plant starts to flower, you can gently harvest a few baby potatoes early—these are sweet and perfect for boiling. But if you’re aiming for full-sized potatoes, wait until the foliage turns yellow and starts to die back. That’s your green light!
How to Check for Readiness Without Damaging Tubers
Not sure if they’re ready? Use your hands to gently dig around the top layer of soil and feel for the size of the potatoes. If they’re still small, cover them back up and give them a little more time. Be gentle—potato skins are delicate when freshly grown.
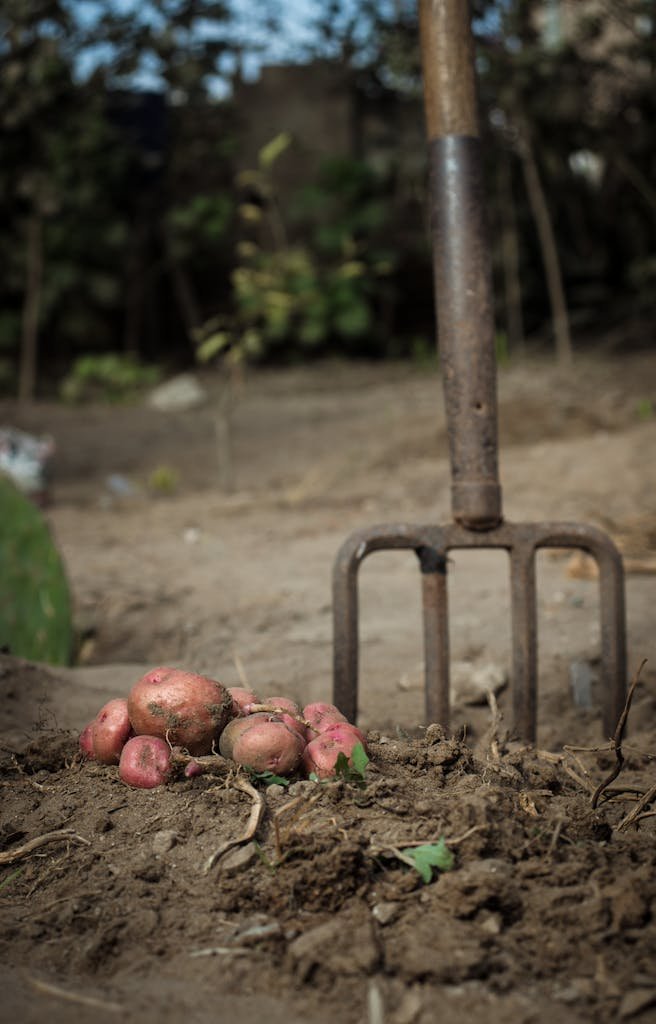
Harvesting Tips for Containers: Tip, Sift, Repeat!
When it’s time to dig in, the easiest method is to tip the whole container out onto a tarp or tray. Use your hands to sift through the soil and pull out your treasures. It’s a bit like hunting for buried gold—and just as fun!
Curing and Storage Methods
Once harvested, let your potatoes sit in a cool, dry, shady spot for about 1–2 weeks to toughen up the skins. This step is called curing, and it helps them last longer in storage. After that, keep them in a dark, cool place like a pantry or root cellar—just no fridge, as it changes the flavor.
Troubleshooting Potato Growing in Containers
Even when you follow all the steps, things can still go a little sideways. But don’t worry—these common problems are easy to fix once you know what to look for. Let’s go through them one by one.
Small Yields? Too Much Shade or Poor Soil
First of all, if you tip over your container and only find a handful of tiny spuds, don’t panic. This usually means your potato plant didn’t get enough sunlight or the soil wasn’t rich enough. Make sure your container is in a sunny spot—at least 6–8 hours a day. Also, double-check that your soil is loose, full of compost, and drains well. A healthy start makes all the difference.
Rotten Tubers? Poor Drainage or Overwatering
Next, let’s talk about mushy, rotting potatoes. Yuck, right? This is often caused by soggy soil. If your container doesn’t drain properly—or if you’re watering too often—your potatoes can rot before they’re ready. So, always use containers with holes in the bottom, and allow the soil to dry out a bit between waterings. Moist, not soaked, is the goal.
Long Spindly Growth? Not Enough Light
Sometimes, your plants grow tall and thin instead of full and strong. When that happens, it usually means they’re reaching for light. To fix this, move your containers to a brighter location. After all, more light equals stronger leaves—and stronger leaves mean better potatoes below the surface.
Common Mistakes Beginners Make
Finally, let’s cover a few beginner slip-ups. Maybe you planted your seed potatoes too deep or packed too many into one container. Or perhaps you forgot to “hill” the soil as the plants grew. Sometimes, it’s just using the wrong type of fertilizer. But here’s the good news: these mistakes are easy to avoid once you know about them—and potatoes are forgiving plants that often bounce back with a little extra care.
Conclusion: Grow Big Yields in Small Spaces
And there you have it—a simple, satisfying way to grow potatoes in containers, even if you don’t have a big garden. With a little sunshine, good soil, and some care through the season, you’ll be digging up your own homegrown spuds in no time. Honestly, it’s hard to beat the feeling of tipping over that container and finding golden treasures tucked in the dirt. It’s a bit like magic, only better—because you can eat it.
Now that you’ve got your potato patch growing strong on the patio, balcony, or backyard corner, what comes next? Well, it’s time to enjoy the harvest! There are so many ways to cook your freshly dug potatoes, but if you want something extra special (and easy), I’ve got just the thing. Try my light and zesty new potato, mangetout, and sorrel salad. It’s full of garden-fresh flavor and makes the perfect side dish for sunny afternoons or quick lunches.
Growing food in containers isn’t just about saving space—it’s about making your garden work for you, no matter where you live. So whether you’re planting your first spud or already dreaming of your next container crop, keep going. Every little harvest is a win.
And remember, the joy is not just in the digging—it’s in the doing. Happy planting, and even happier eating!